
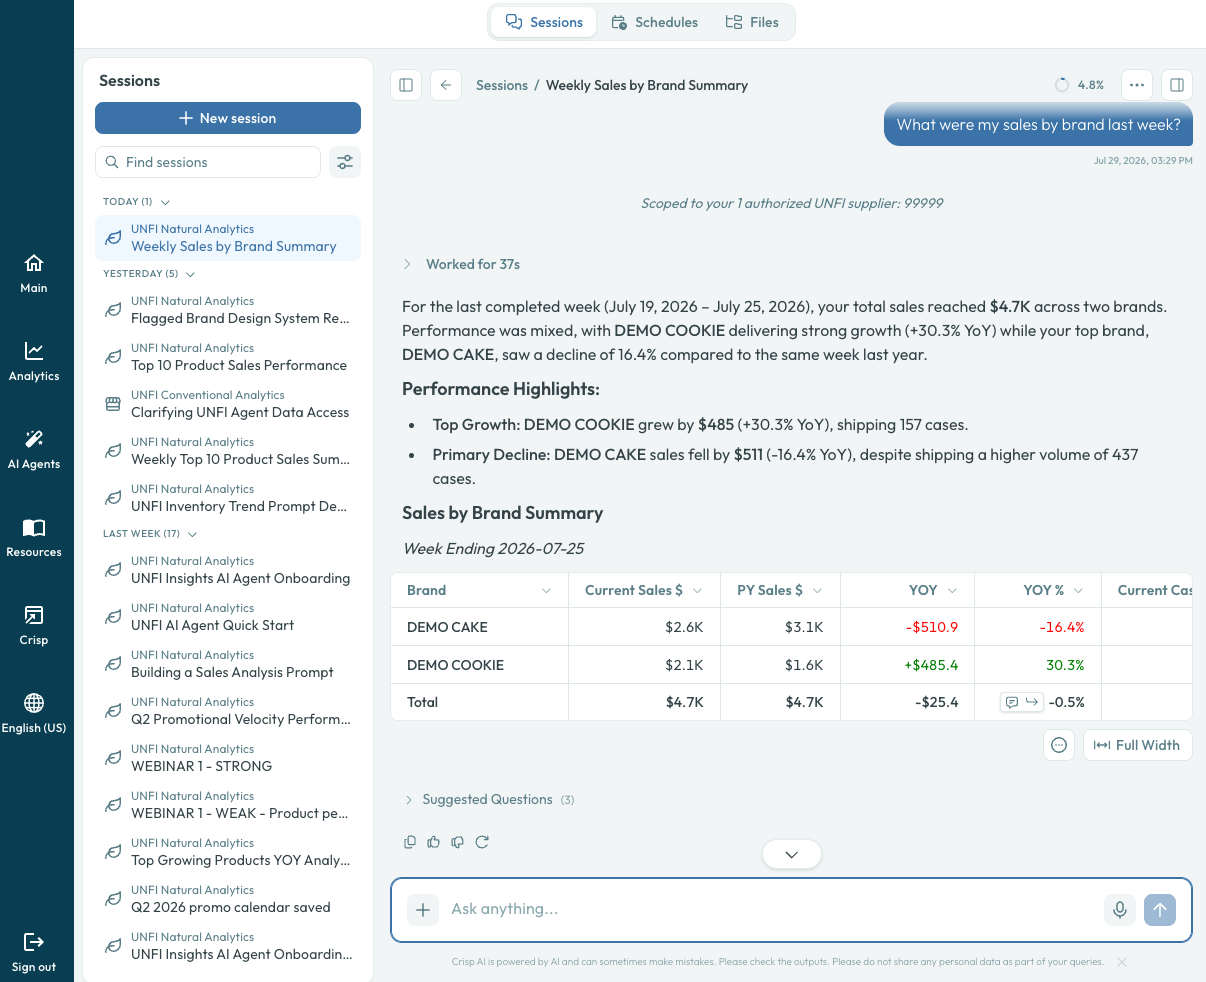
A session showing a weekly sales-by-brand summary with narrative highlights, an inline table, and the session list in the left rail.
Starting a session
There are two ways to begin:- Home page — Type your question directly into the message input on the home page. Select an agent from the dropdown, then press Enter. A new session is created automatically.
- Sessions page — Navigate to Sessions in the toolbar, then click New Session. Choose an agent and start chatting.
Session list
The Sessions page shows all of your past conversations sorted by date. You can:- Search sessions by title, agent name, or message content. Content search finds sessions containing the words you type, even when those words never appear in the title.
- Switch agents using the agent selector at the top.
- Rename a session — open the
...menu on any session and choose Edit description. Custom titles persist and update in the list immediately. - Delete a session from the same
...menu.
Editing your messages
Click the Edit button on any of your own messages to modify it. The agent re-processes the conversation from that point forward, and any files or charts generated after the original message are updated to reflect the new context. Editing a message while the agent is still generating is safe — stop and rewind happen atomically so the new version replaces cleanly.Resumable sessions and multi-device support
If your network drops, your tab is discarded by the browser, or you switch to a different device, the session automatically reconnects and picks up where it left off. A small banner shows the reconnection progress and the number of retry attempts. Reconnects also fire automatically when you refocus the tab, come back online, or the browser flags the network as active. You do not need to do anything. If a generation fails unexpectedly, the UI recovers with an error message instead of hanging.Generation continues in the background
You do not need to keep the tab open while the agent works. Once the agent has started generating, the response runs on the server and finishes on its own. You can navigate to other parts of the app, switch to another session, or close the browser entirely. When you return to the session, the completed response is waiting. Up to two sessions can generate at the same time. If you start a generation in a third session, the oldest running generation is automatically stopped.Stopping and resubmitting
Click the Stop button to cancel a running response. Once stopped, you can edit your last message and send it again.Session age banner
When a session is more than 24 hours old, a gentle banner appears at the top of the chat suggesting you start fresh. You have three options:- Start new session — Opens a blank session with the same agent.
- Summarize & continue — The agent summarizes the key context from the current session and carries it into a new one. You keep the important details without the token overhead of a very long conversation.
- Dismiss — Hide the banner and continue in the current session.
How “Summarize & continue” works
When you click Summarize & continue, the system:- Sends the entire conversation to a summarization model.
- Produces a concise text summary capturing the key context, findings, and any file references.
- Creates a new session and injects the summary as initial context.
- Opens the new session so you can continue from where you left off.
Rich content in messages
Agent responses can include a variety of rich content:- Tables — Query results are displayed as interactive, sortable tables with infinite scroll for large result sets. Table copy-to-clipboard preserves the user gesture so exports work even under stricter browser clipboard policies.
- Charts — D3 visualizations rendered inline. Click to expand or refine. See Visualizations.
- File cards — Links to generated files (CSV, PPTX, images) displayed as clickable cards with previews. Markdown files show an inline preview. File names with spaces render as a single clickable pill.
- Inline diff cards — When an agent edits an existing file, the chat shows a compact unified-diff card with syntax-highlighted added/removed lines, the file icon, and a link to view the full file.
- LaTeX math — Mathematical formulas and expressions render correctly inline and in blocks. Agents use LaTeX when showing derived-metric calculations (for example, CAGR or gross margin percentage) so you can verify the math.
- Colored text and highlights — Agents can use color to draw attention to positive/negative values or highlight key figures; inline HTML for formatting is supported in chat and email channels.
- Follow-up questions — Suggested next questions appear as clickable buttons below the agent’s response. Rendered as structured widgets so they don’t depend on fragile markdown.
- Interactive widgets — Quick-reply buttons and multi-select widgets appear inline; if a response contains several widgets the UI groups them under a single Submit button.
- Code blocks — Syntax-highlighted code for TypeScript, Python, SQL, JSON, XML, CSS, Markdown, YAML, and more.
- Recalled-memories badge — When the agent uses something it learned from a past session, a badge appears on that interaction. Expand it to see which memories fired and delete any that are outdated.
Attaching files
You can attach files to your messages in four ways:- Paperclip menu — Click the paperclip icon next to the message input for Upload file (from your computer) or Select file (pick an existing file from the VFS).
- Drag and drop — Drop a file onto the message input to upload.
- @ mention — Type
@and start typing a file name. The dropdown searches across My Files, Shared, and Session files and hides files with auto-generated UUID names. Press Enter or click a result to insert a clickable file pill. See Files. - Paste a long list — When you paste a line-delimited list of 5 or more lines (for example, a column of UPCs copied from a spreadsheet), Crisp offers to attach it as a CSV file instead of inserting it inline. Choose Attach as CSV to upload it as a file the agent can read on demand, or Paste as text to keep the original behavior. Tabs, commas, semicolons, and pipes are detected as column separators and re-emitted as a standard comma-delimited CSV; single-column lists are supported too. Attaching long lists as files keeps long codes from being truncated or misread when the agent uses them in queries.
Supported file formats
Chat uploads and the file explorer share a single allowlist, so anything you can drop on the message input also works in the Files page. Each message’s combined upload size is capped at 25 MB.
Attachments are previewed in the message input with a type-specific icon — for example, DOC for Word documents, XLSX for spreadsheets (including CSV and TSV), CODE for source and data files, and PPTX for presentations — so you can confirm the file was classified correctly before sending.
If a file is rejected, check that its extension is on the list above and that the message’s combined upload size is under the 25 MB limit.