
Why you would use this feature
As you build or edit your planograms, it is often necessary to move objects around in your planograms. This feature allows you to select the items to move and choose options regarding the destination for those items. For example, you can choose to move positions, specify which positions to move, and the options for specifying where those positions should be moved.Feature Options
Add Move Rule
Move Positions
If the merchandising settings within your planogram would cause the position being moved to be placed manually, this feature may not place the position being moved in the expected location.

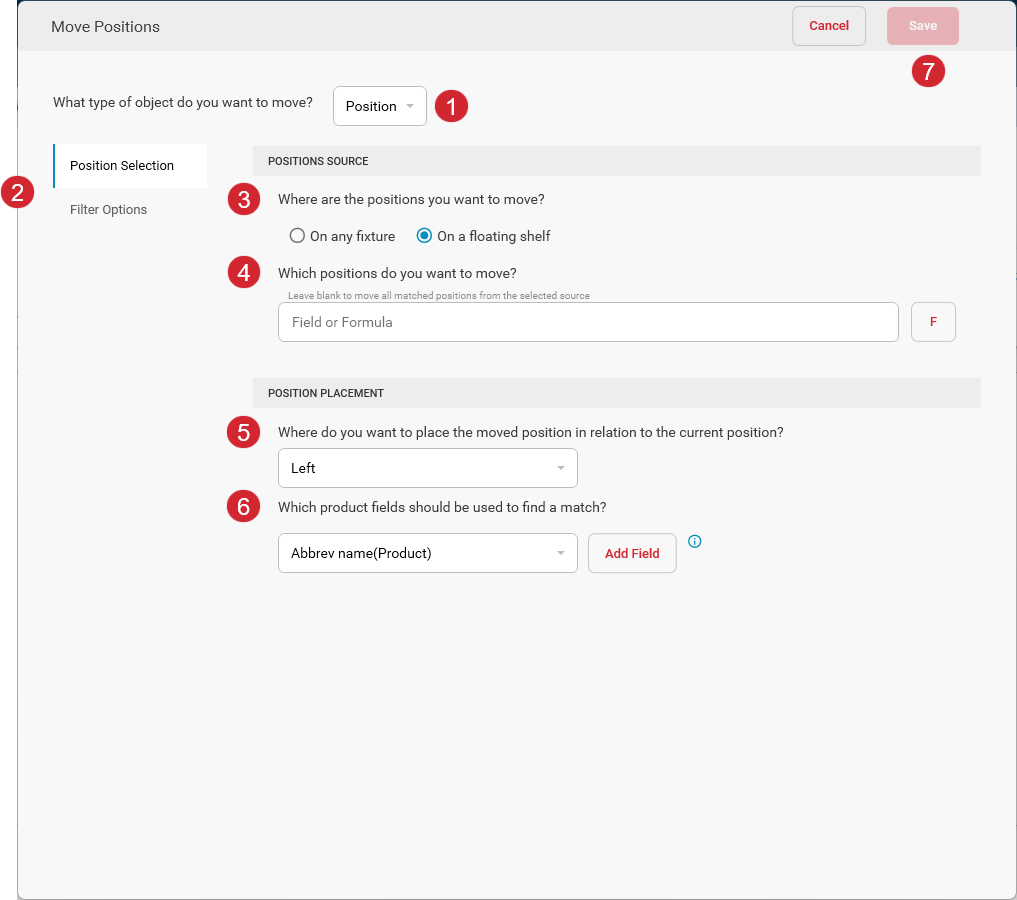
To move positions, choose Position as the type of object you want to move.

To specify which positions to move and select the source of those positions, choose Position Selection.
To limit the planograms to which the position moves will be applied, choose Filter Options. The Filter Options page allows you to define a filter formula. Only planograms matching the filter formula will be the ones to which the specified products will be added.

The positions you would like to move can be located anywhere within the planogram if you choose the On any fixture option or only on shelves that are floating outside the planogram space if you choose the On a floating shelf option.

You can optionally specify a filter to limit the scope of positions selected to be moved. If no filter is specified, all positions within the position source would be eligible to move.

Positions being moved can be placed to the left or right of existing positions on your planograms based on the matching rules that are defined.

You can specify one or more fields to be used when trying to match positions to be moved with potential target positions on your planograms. The first existing position that can be matched based on the listed attributes that is closest to the original location of the position being moved will be selected.
To specify a matching field, choose the field in the dropdown list under Which product fields should be used to find a match? heading and click the Add Field button to add the field to the matching list. You can have multiple fields in the matching list, and you can specify whether the matching field is a required match or not.
If your matching rules cause a position being moved to match multiple possible target positions, the one that has the nearest Y-coordinate will be selected. If there are multiple matches with the same closest Y-coordinate, the leftmost one will be selected if the relative placement direction is set to Left or the rightmost one if the relative placement direction is Right.

Once your Move Positions rule has been defined, click Save to add it to the position moves list. If you do not wish to save the rule, click the Cancel button.