
Image Clean-Up
This automation allows you to create a standardized image library by reviewing all your planograms, determining which images are being used and then copying them to a single location and applying a naming standard.Why you would use this feature
You have images referenced from multiple places and need to figure out which ones the planograms use. Or your image library has images from discontinued products just taking up space or multiple versions with slightly different names. Standardizing your image library can ensure that the correct images are used every time and you aren’t storing more images than what is in use.Feature Options
Where do you want to save your images?
Select the folder you want to use as your new image library source. Images that are in use will be copied into this folder.Create planogram containing products with no images found
Selecting this option will create a planogram (named MissingImagePlanogram.psa) in the folder you specified that includes each of the products that are used in your selected planograms that did not have all the necessary images available.Product Image Options
The options selected here will affect how this automation searches for your product images.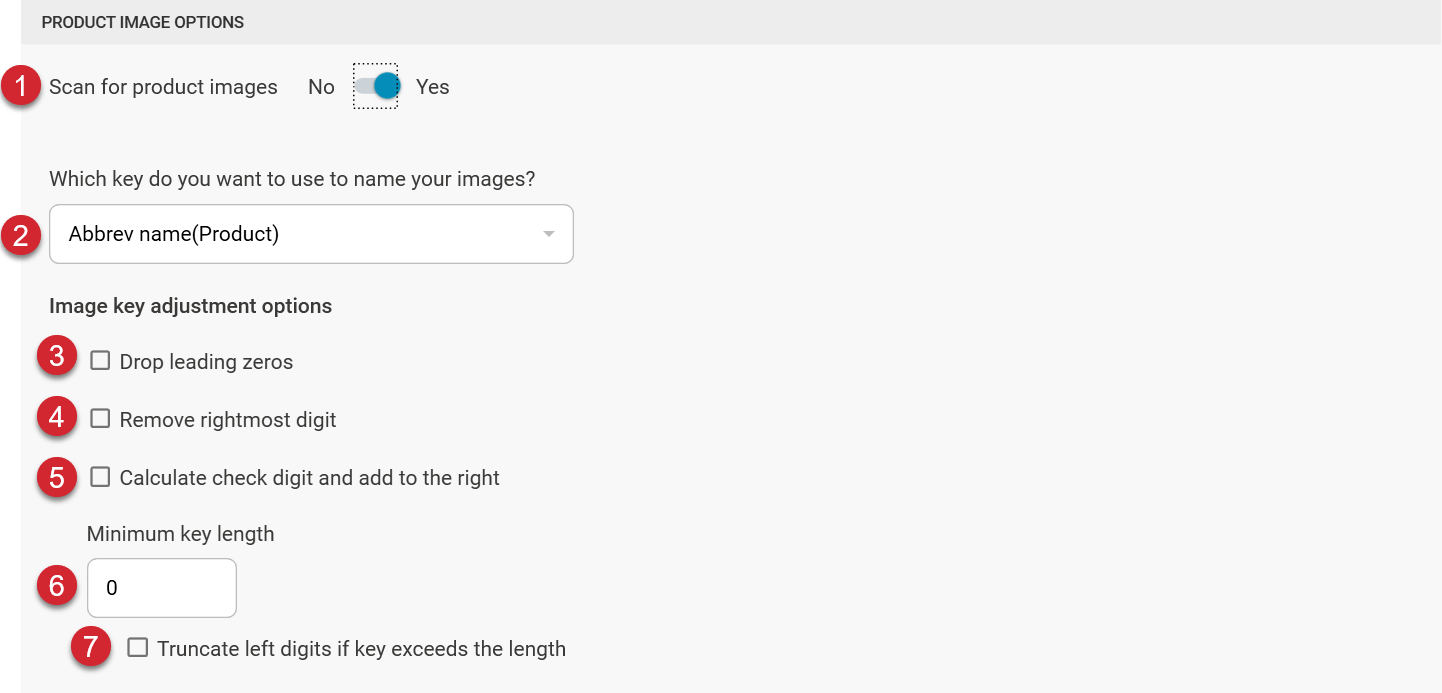

Select Yes to enable the product image options and configure the automation to scan for product images
when it runs. If you do not want to scan for product images, select No.

Select a field to use to name the product images that will be copied into the specified folder. Any product
field can be specified here, so if a custom identifier is stored in a description field, it can be chosen
instead of UPC or ID.
The value in the selected field will only be used to name the new image files.
Planogram image matching will still be based on the Key field for product bitmaps setting in Space Planning.
If you want to use a key to identify your images that is not UPC or ID, that can be set within Space Planning.
Image key adjustment options

Select this option to remove any leading zeroes from the selected Product Key’s value, e.g. ‘00000001234567’ would
become ‘1234567’.

Select this option to drop the rightmost number from the selected Product Key’s value, e.g. ‘1234567’ would become
‘123456’. This can be useful if you have check digits in your key field but cannot have them in your image file names.

Select this option to calculate a check digit from the selected Product Key’s value and add it as the rightmost
digit. This can be useful if you don’t have check digits in your key field but must have them in your
image file names.

This value determines the minimum length of the new image file name. Product Key values shorter than this length will have
zeroes added to the left until it meets the desired length, e.g. a length of 14 would make ‘1234567890’ become
‘00001234567890’. A value of 0 will leave all Product Key values at their original length. We recommend using a length of 14 digits (GTIN), which works fine in planograms that use 10-, 12- or 13-digit UPC/IDs.

Cut off digits (even non-zero digits) from the left if the Product Key’s value is longer than the desired length,
e.g. a length of 3 would make ‘54321’ become ‘321’.
Subfolder Options
Use a long file name folder structure
Selecting this option will place all images within the specified folder using their key names as they are found within their specified key field.Use an Intercept folder structure
Selecting this option will place images into the specified folder using the older InterCept image format which organizes images into folders by manufacturer code, e.g. a UPC of ‘1234567890’ would have a file called ‘67890’ placed in a folder called ‘12345’.Other Image Export

Selecting this scans your planogram’s fixtures for images. Any fixtures with an image file specified in their
Fixture Properties > Image > Bitmap ID field will be scanned.
Selecting this scans your planograms for background images. Any planograms with an image file specified in their
Planogram Properties > Image > Bitmap ID field will be scanned.
Selecting this scans your planograms for floor images. Any planograms with an image file specified in their
Planogram Properties > 3D Effects > Floor bitmap filename field will be scanned.
File Extensions
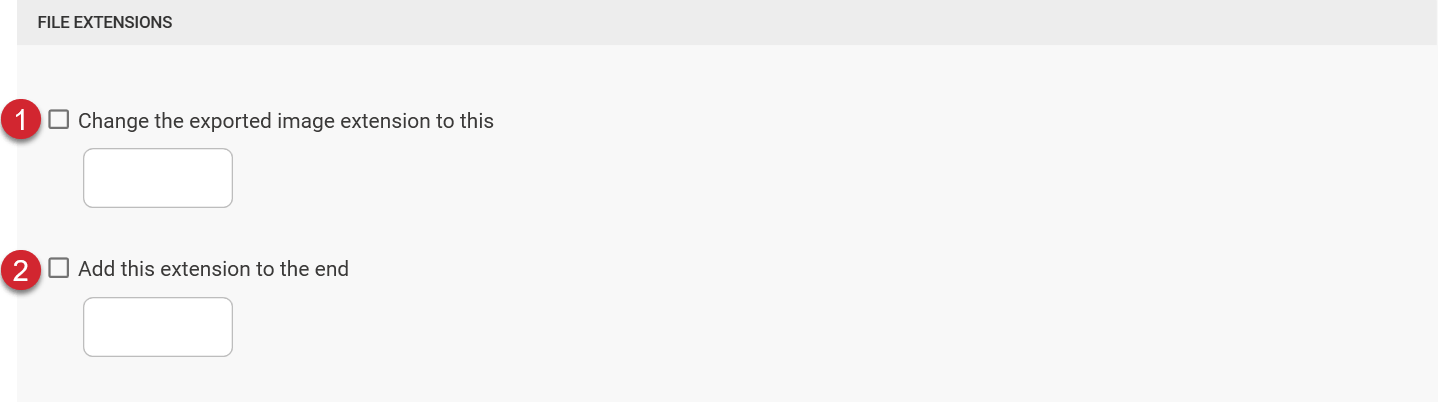
This allows you to change the extension of the image output to whatever you specify in the text box to the right. Typing
‘.jpg’ in the text box will change ‘12345.1’ to ‘12345.jpg’. Note that images with multiple
orientations (.1, .2, .3, etc.) will all have the same output file name and extension when using this option. In this case, only the .1
version of the image will be retained.
This allows you to add an extension to the end of the existing one. Whatever you specify in the right text box will be added. For example, typing ‘.jpg’ in the text box will change ‘12345.1’ to ‘12345.1.jpg’.