
Before you upload, the Space Planning Upload connector must be configured. The connector controls how your uploaded files are interpreted (retailers, categorizations, planogram and store assignment mappings, and validation rules).
1. Uploading planograms
1
Navigate to Planogram Ingestion
From the Crisp home page, click Planogram Ingestion.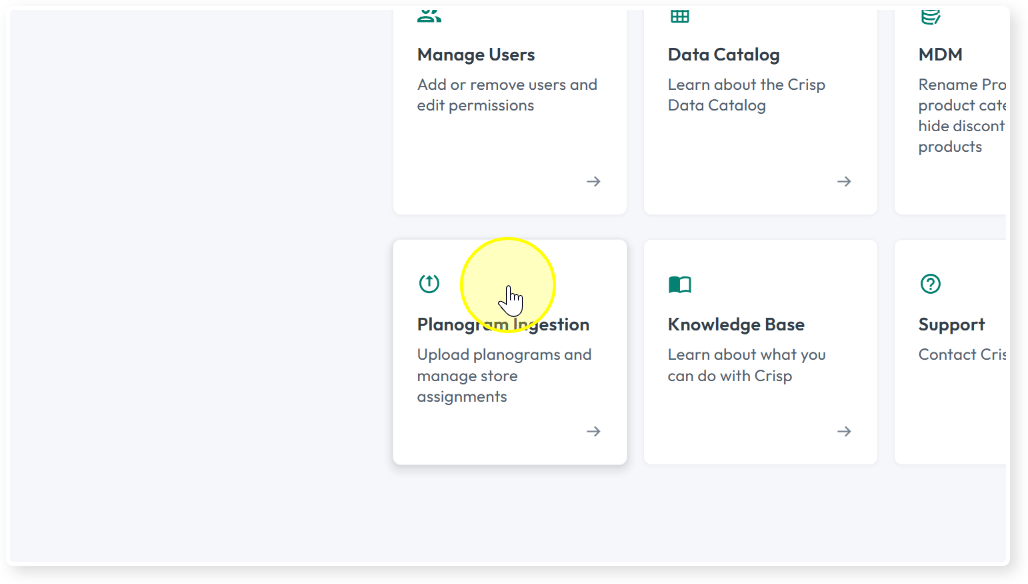
2
Click Upload
On the Planogram Analytics page, click the Upload tile.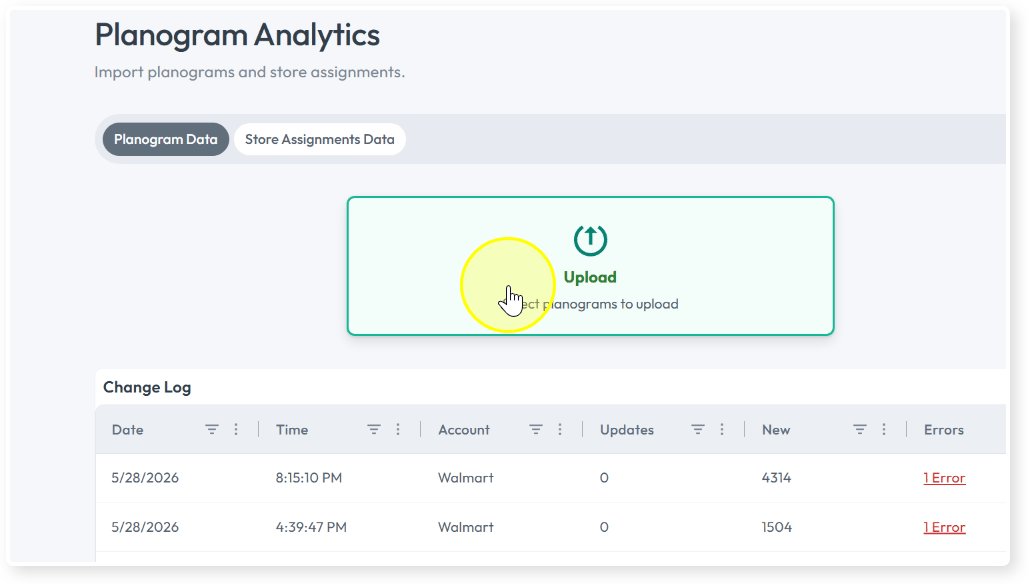
3
Select the Retailer
Choose the retailer that these planograms apply to.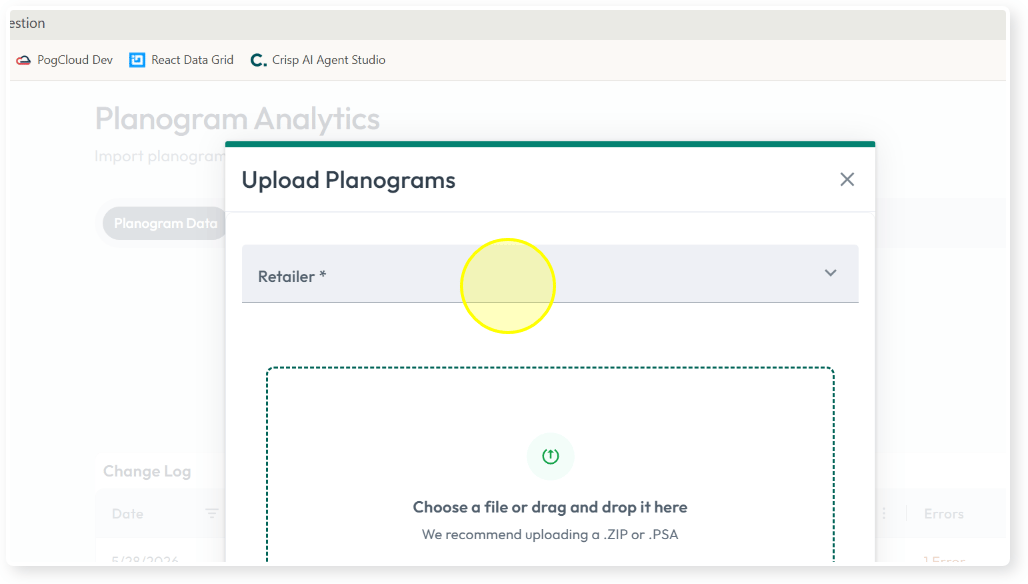
4
Select the Team
Choose the team (for example, Beverage Team → Beer).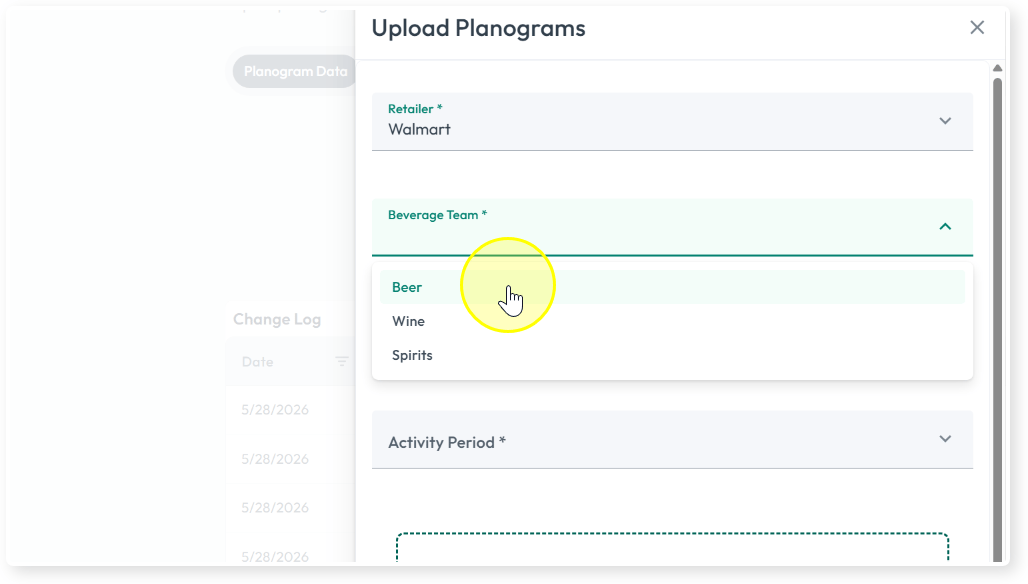
5
Select the Activity Year
Choose the year these planograms apply to.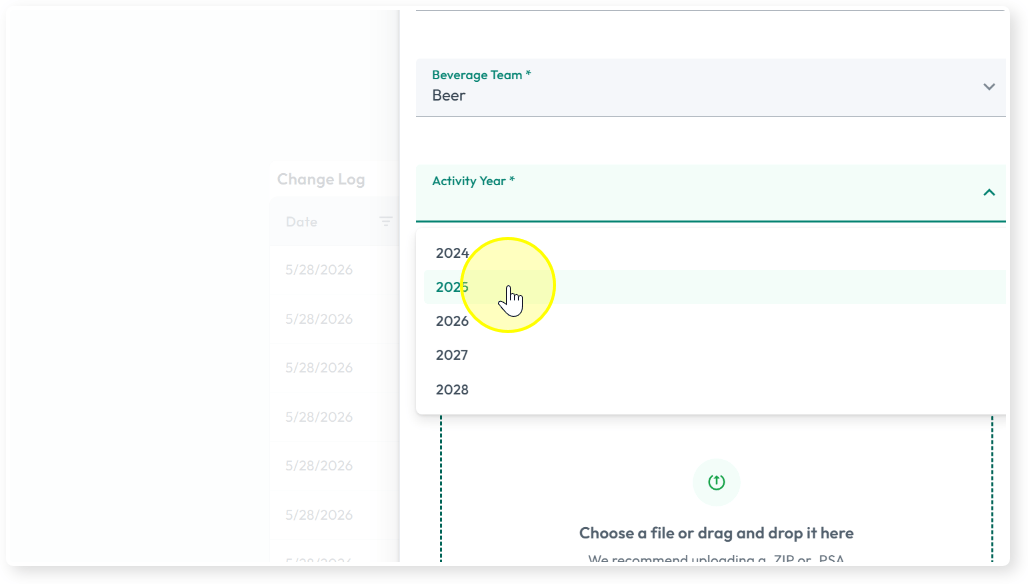
6
Select the Activity Period
Choose the period (Spring, Summer, Fall, or Winter).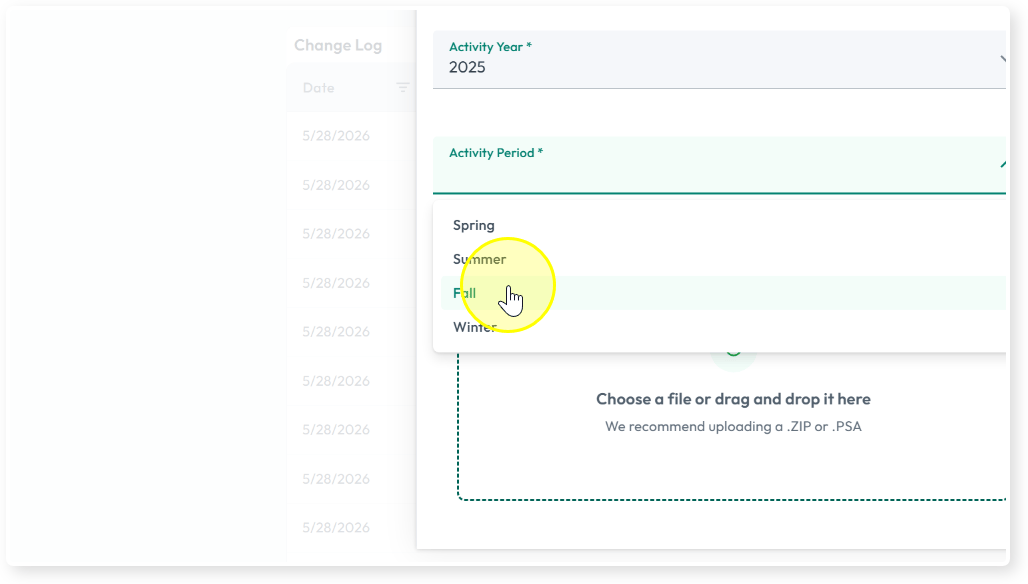
7
Add your file(s)
Click the upload area to browse, or drag and drop your ZIP files. You can upload planogram files only, or planogram files bundled with a store assignment file — see Section 2.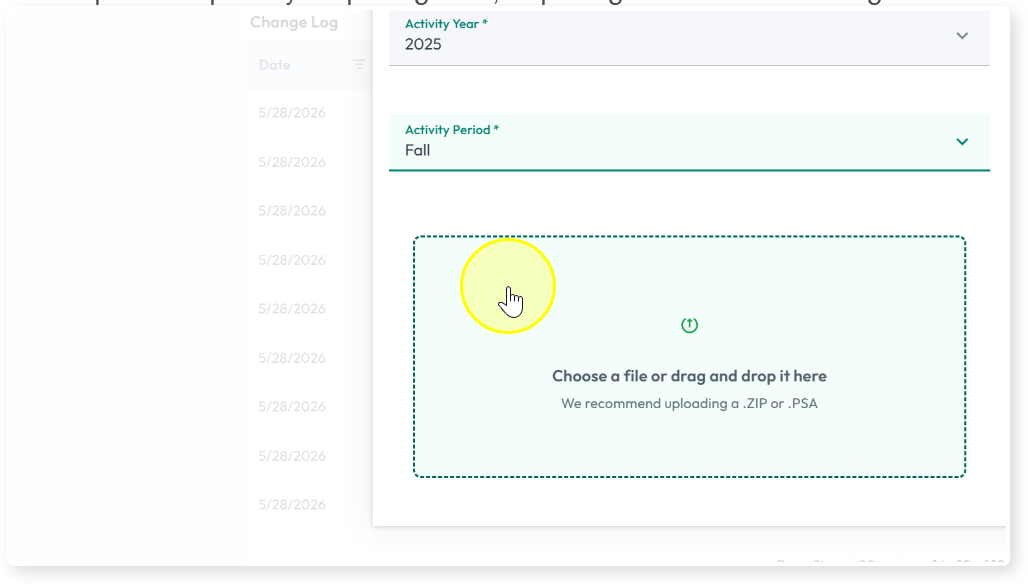
8
Submit
Add any additional ZIP files if needed using Add file, then click Submit. The upload and transformation process will begin.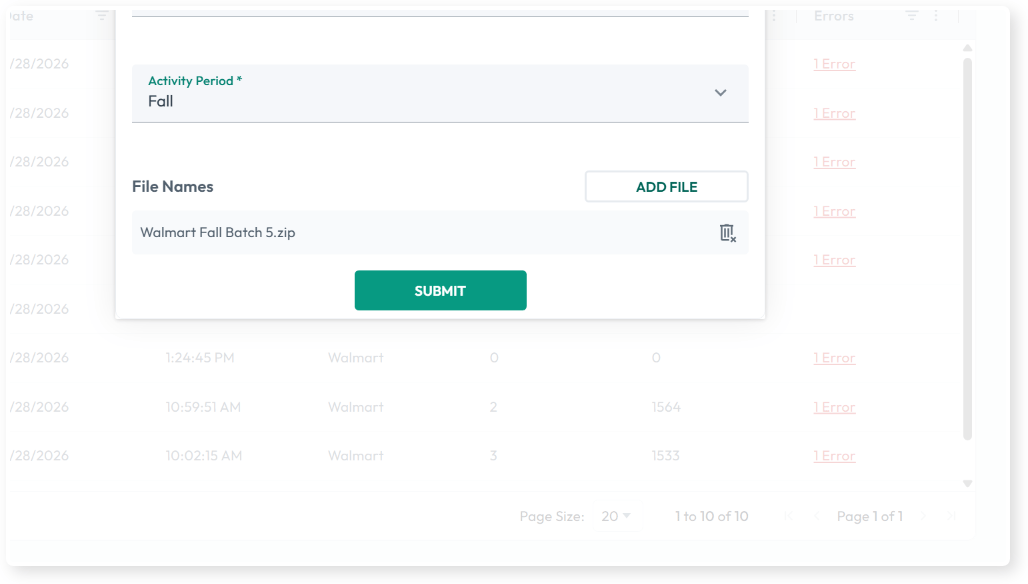
9
Confirm upload completed
When the upload finishes, you’ll see Upload completed successfully! Click Close.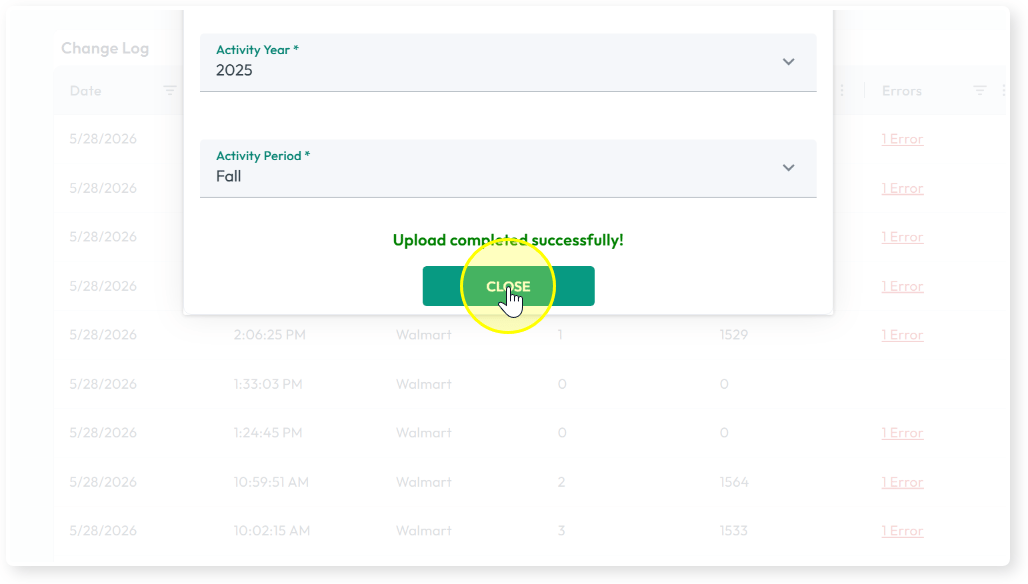
2. Including store assignments in a planogram upload
Store assignment files can be bundled inside your planogram ZIP files. Add a file namedassignment.csv or assignment.xlsx to the ZIP before uploading.
3. Managing store assignments
Store assignments can also be uploaded separately from planograms. Use the methods below depending on your workflow.3a. Downloading existing assignments and the upload template
The downloaded file also serves as a template for preparing a new upload.1
Open the Store Assignments Data tab
On the Planogram Analytics page, click the Store Assignments Data tab.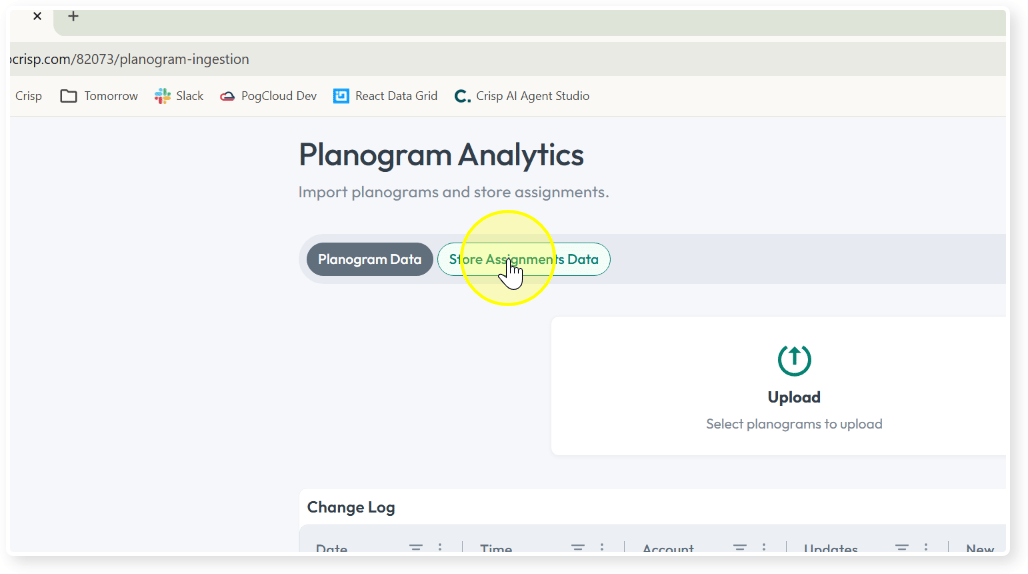
2
Click Download
Click the Download tile to export your existing store assignments. Review or modify the file to prepare it for upload.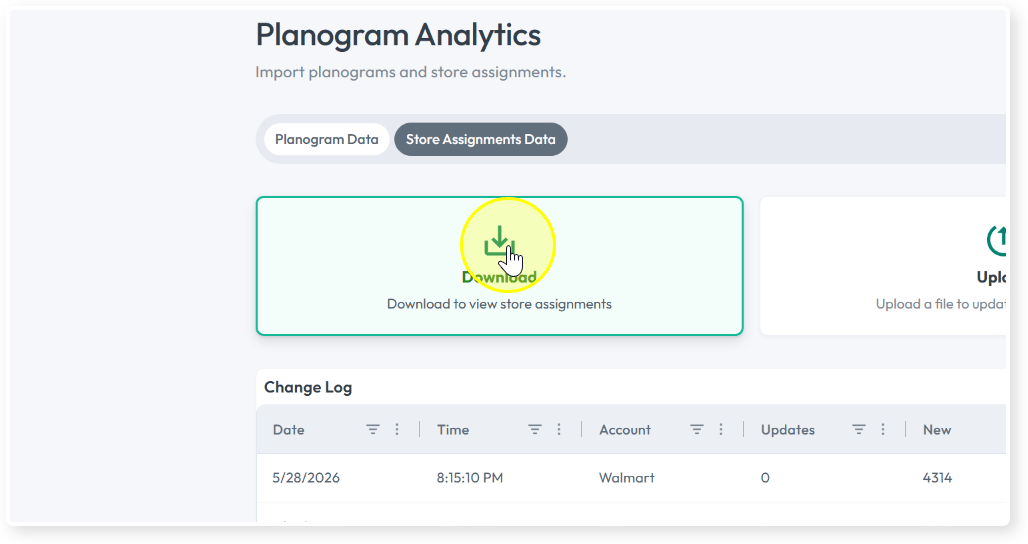
3b. Uploading store assignments
1
Click Upload
On the Store Assignments Data tab, click the Upload tile.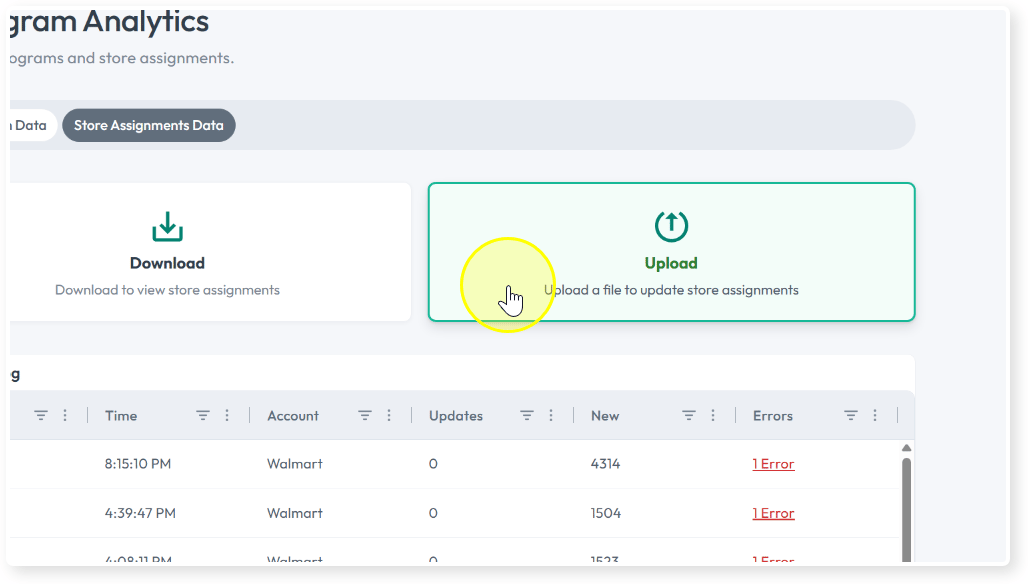
2
Select the Activity Period
Choose the activity period for the upload.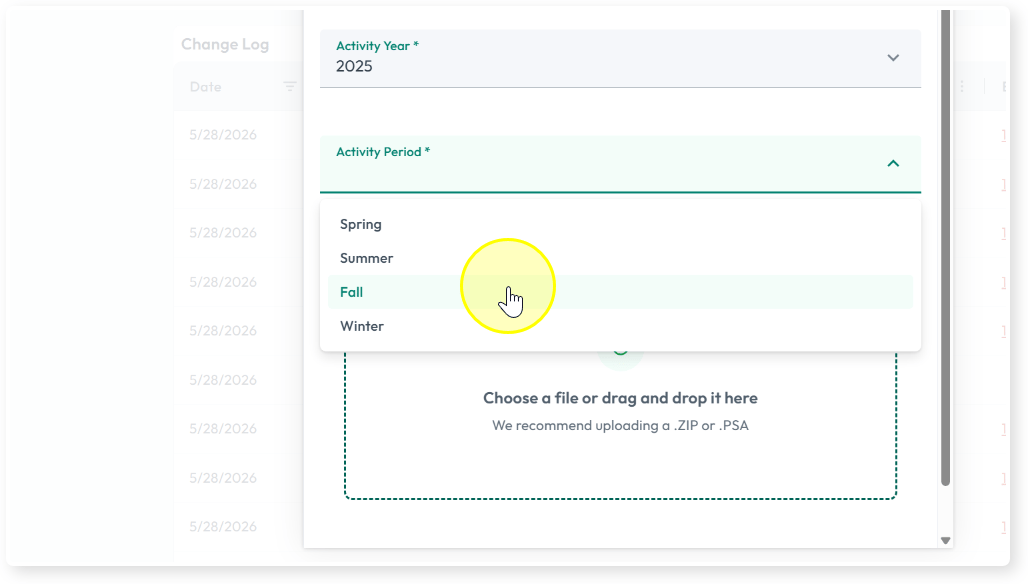
3
Add your file
Click to browse, or drag your 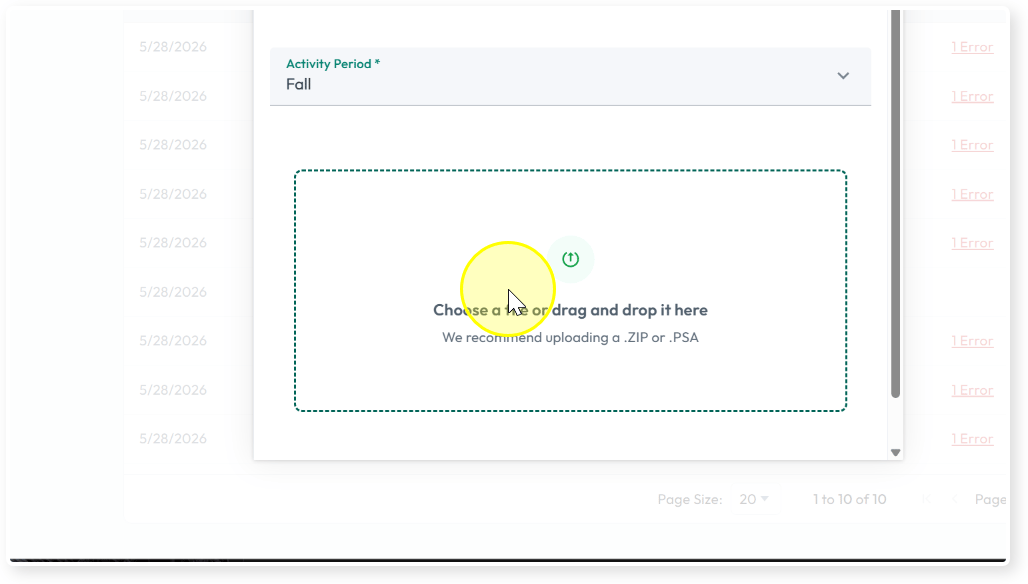
assignment.csv or assignment.xlsx file into the upload area.4
Submit
Click Submit to start the upload.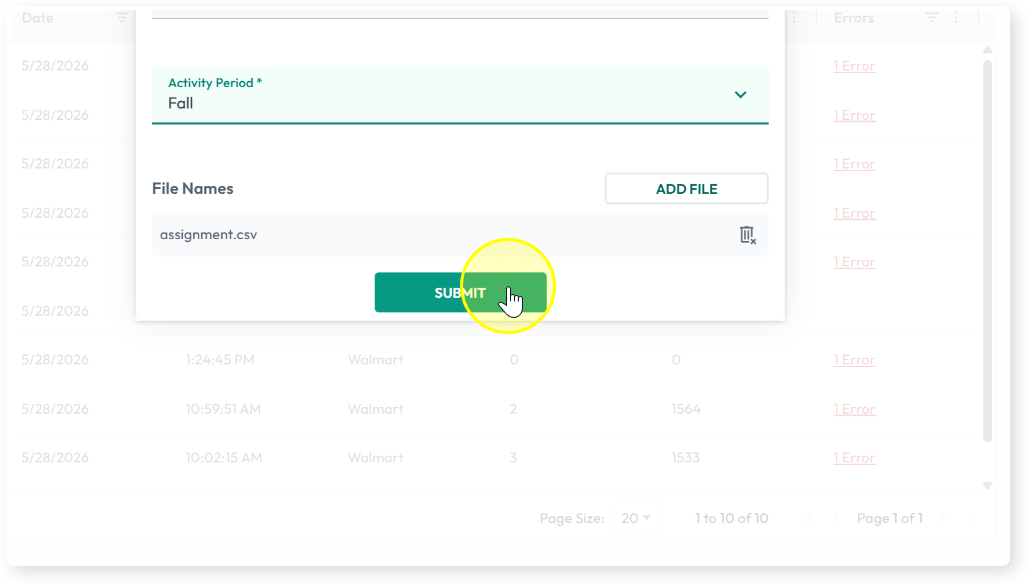
3c. Uploading stores via MDM
Use this option to update the underlying store list in AI Master Data.1
Navigate to AI MDM
From the left navigation, click AI MDM.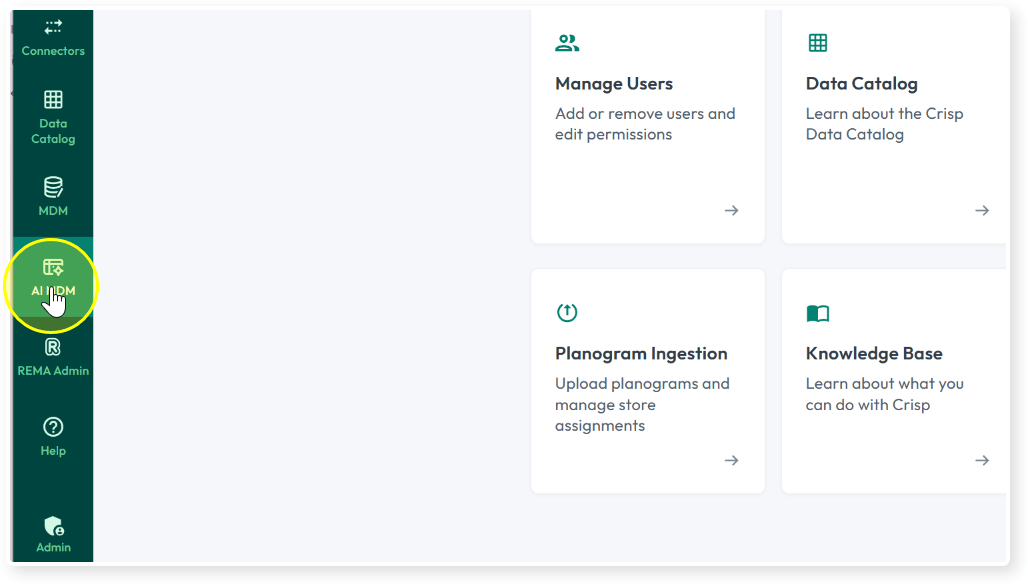
2
Click Import
On the AI Master Data page, click Import.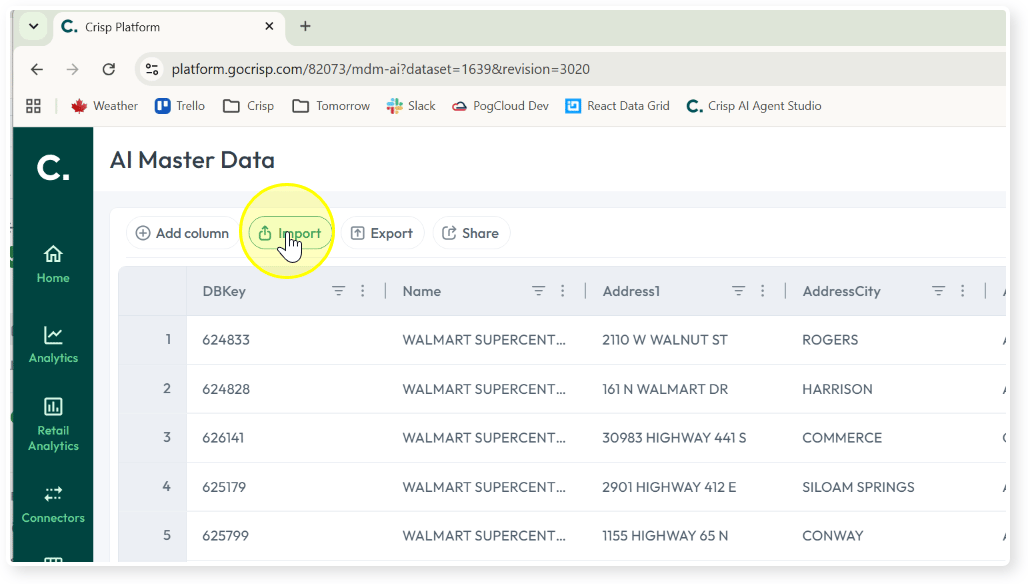
3
Choose your file
In the Add Revision dialog, upload a 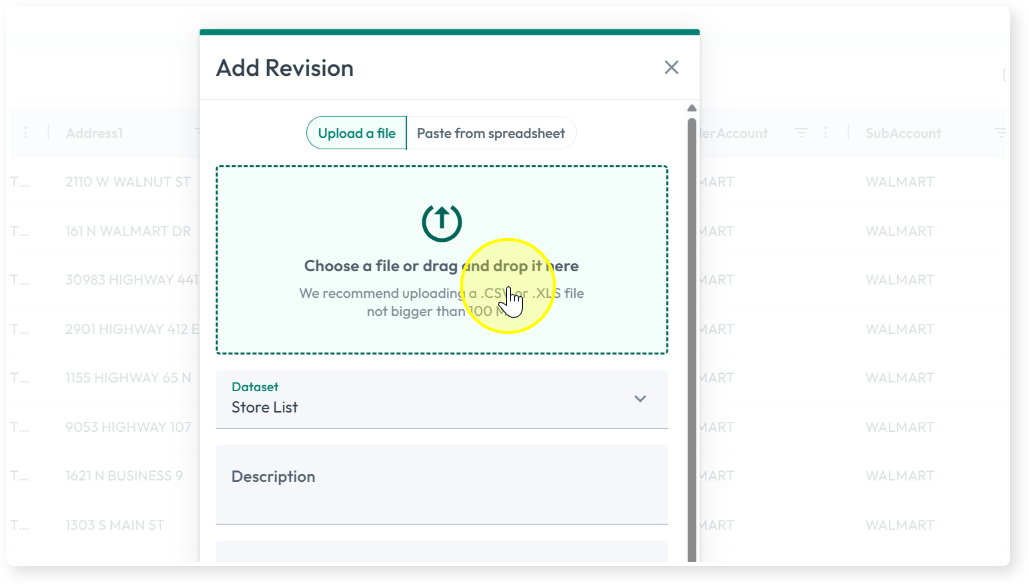
.CSV or .XLS file containing your store assignments.4
Enable Upsert mode
Select Upsert mode to update existing records and add any new ones. Existing rows are preserved unless they share the same primary key.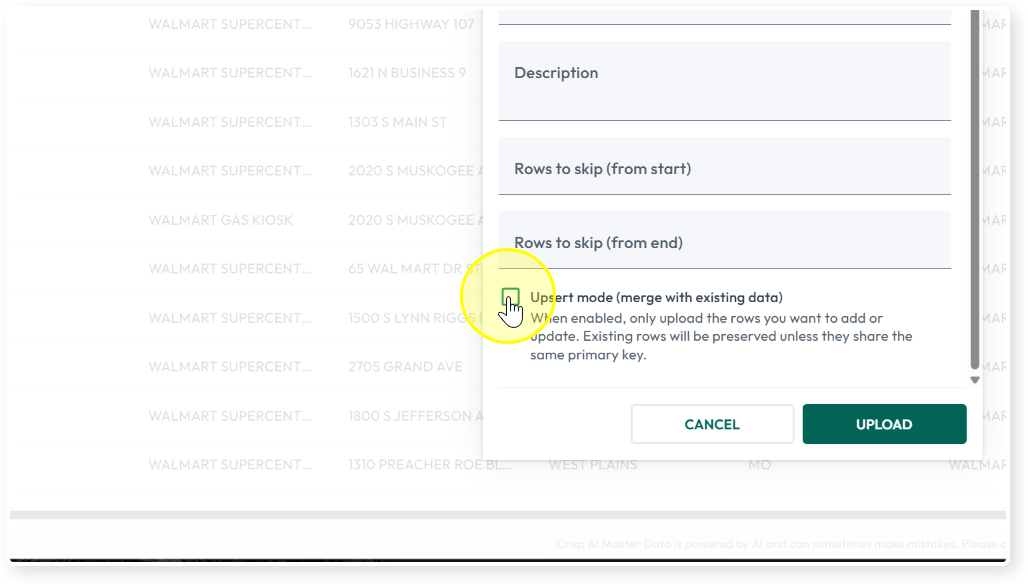
5
Click Upload
Click Upload to apply the changes.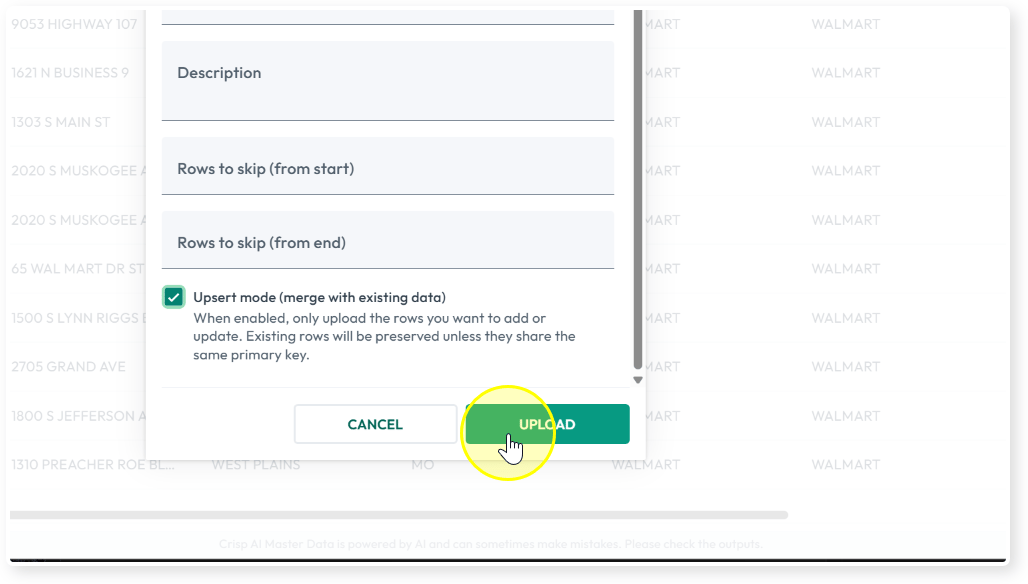
Related
Space Planning Upload connector
Configure how planogram and assignment files are interpreted when uploaded.