> ## Documentation Index
> Fetch the complete documentation index at: https://docs.gocrisp.com/llms.txt
> Use this file to discover all available pages before exploring further.
# Using Crisp with Looker Studio
 Crisp's [BigQuery solution](/docs/support/articles-BigQuery-connection-setup-guide) allow users to quickly and easily import their retailer and distributor data into the cloud. With the complementary [Looker Studio](https://datastudio.google.com/) tool, Crisp users can load their BigQuery tables into [customizable Looker dashboards and reports](https://www.youtube.com/watch?v=3r_yg-FTi5w).
#### Setting up the Looker Studio Connector
1. Log into your [Crisp](https://platform.gocrisp.com/) account.
2. From the main menu on the left side of the screen, select \*\*\*\***Connectors.**
3.
Crisp's [BigQuery solution](/docs/support/articles-BigQuery-connection-setup-guide) allow users to quickly and easily import their retailer and distributor data into the cloud. With the complementary [Looker Studio](https://datastudio.google.com/) tool, Crisp users can load their BigQuery tables into [customizable Looker dashboards and reports](https://www.youtube.com/watch?v=3r_yg-FTi5w).
#### Setting up the Looker Studio Connector
1. Log into your [Crisp](https://platform.gocrisp.com/) account.
2. From the main menu on the left side of the screen, select \*\*\*\***Connectors.**
3. 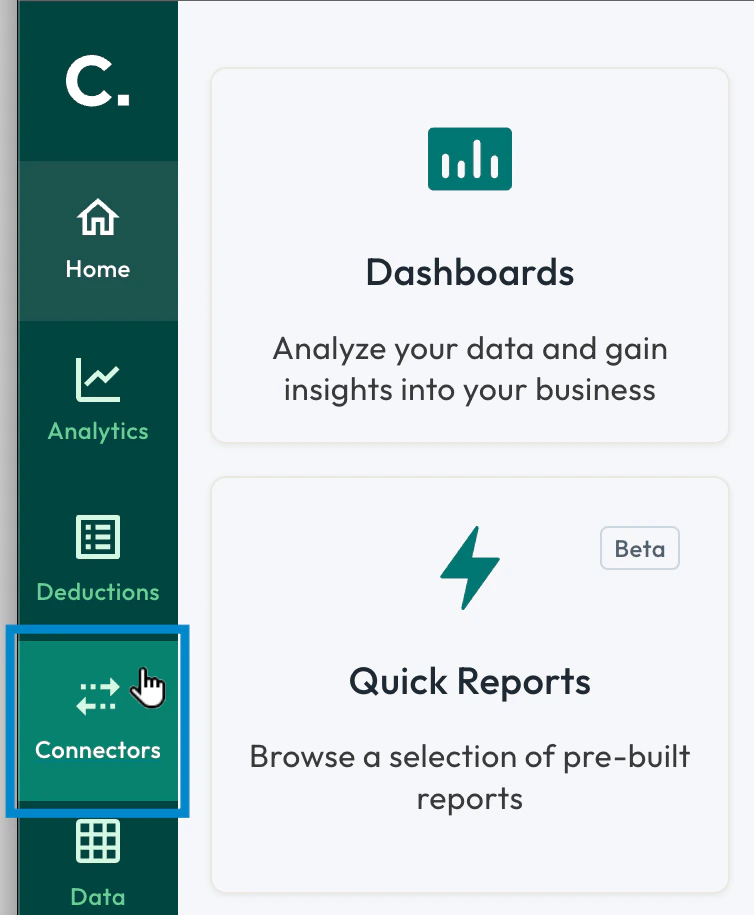 4. Select the **Add connector** button.\\
 5. Select the **Data Destinations** tab, then select the **Google Data Studio** tile.\\
 6. Name your connector (we recommend something unique) and provide the Google Cloud email(s) to receive the data share.\
**Note:** Crisp does not verify the identity of these user accounts. It is highly recommended to copy/paste the identities rather than type them manually.\\
6. Name your connector (we recommend something unique) and provide the Google Cloud email(s) to receive the data share.\
**Note:** Crisp does not verify the identity of these user accounts. It is highly recommended to copy/paste the identities rather than type them manually.\\
 7. Click the drop-down menu to select which Google Cloud Region to utilize.\
**Note** : This setting cannot be changed once the connector is saved.\\
7. Click the drop-down menu to select which Google Cloud Region to utilize.\
**Note** : This setting cannot be changed once the connector is saved.\\
 8. Next, select the source connector(s) you want data shared from.\\
 9. Select the checkboxes next to each data table you want Crisp to export to Looker Studio.\\
 10. If you want, choose additional columns to include in your export:
* To include a column that identifies which source connector the data came from, select the **Include Source Connector Configuration ID** option.\
**Hint** : This is useful if you have multiple connectors for the same retailer, such as one for U.S. sales and one for Canadian sales.
* To include a column that provides the date and time data was last sent from Crisp to the destination, select **Include Last Exported Timestamp**.\
**Note** : Crisp retroactively ingests and re-exports data for a set period of time after the initial data capture, known as a lookback period, to account for changes from the source (such as missing register sales added later). You can use the last exported timestamp column to confirm if data was recently exported from Crisp to help troubleshoot issues or reduce costs by automating how often data flows from a destination to other systems at your organization. For more on retroactive data changes, see [Data changes for destination connections](/docs/support/articles-Data-changes-for-destination-connections).
11. Select the **Save** button.\\
10. If you want, choose additional columns to include in your export:
* To include a column that identifies which source connector the data came from, select the **Include Source Connector Configuration ID** option.\
**Hint** : This is useful if you have multiple connectors for the same retailer, such as one for U.S. sales and one for Canadian sales.
* To include a column that provides the date and time data was last sent from Crisp to the destination, select **Include Last Exported Timestamp**.\
**Note** : Crisp retroactively ingests and re-exports data for a set period of time after the initial data capture, known as a lookback period, to account for changes from the source (such as missing register sales added later). You can use the last exported timestamp column to confirm if data was recently exported from Crisp to help troubleshoot issues or reduce costs by automating how often data flows from a destination to other systems at your organization. For more on retroactive data changes, see [Data changes for destination connections](/docs/support/articles-Data-changes-for-destination-connections).
11. Select the **Save** button.\\
 12. After saving, reopen your Google Looker Studio connector to verify the connection was established.\\
 #### Accessing your Crisp data in Looker Studio
Once you complete the connector set up in Crisp, you can finalize the setup in BigQuery and Looker Studio and start building with your Crisp data.
**Note** : Crisp initiates a data load into the BigQuery project within 10 minutes to export the first dataset that includes backfill data. The time to initially backfill data depends on the number of tables, but should not take more than a day. Ongoing data availability depends on the source, but Crisp data typically updates within six hours of source data availability. When the connector is deleted, Crisp deletes the connected datasets as well.
**To access your data in Looker Studio** :
1. Log in to Google BigQuery, then follow the instructions in the [BigQuery documentation > Star a project](https://cloud.google.com/bigquery/docs/bigquery-web-ui#starring_adding_a_project) article.
2. Choose to star your project by name and enter **crisp-platform-shared** as the project name.
3. In Looker Studio, create a new data source, then select Shared Projects and set the Billing Project to a project owned by your organization and the Shared project name to the name of your starred Crisp project (e.g., **crisp-platform-shared** ). For more: [Looker Studio Help > Connect to Google BigQuery](https://support.google.com/looker-studio/answer/6370296).
#### Using Crisp Looker Studio Templates
For your convenience, we have created Looker Studio templates to help you get started analyzing your data. To get started using templates:
1\. Set up the Google Looker Studio connector as described in the section above.
2\. Confirm you've previously connected BigQuery to Crisp by opening [BigQuery](https://console.cloud.google.com/bigquery) and locating "crisp-platform-shared" in the list of projects in the sidebar. If you haven't connected yet, please follow [these steps](/docs/support/articles-BigQuery-connection-setup-guide).
3\. Open the template, then select the **Use template** button at the top-right corner of the screen.
#### Accessing your Crisp data in Looker Studio
Once you complete the connector set up in Crisp, you can finalize the setup in BigQuery and Looker Studio and start building with your Crisp data.
**Note** : Crisp initiates a data load into the BigQuery project within 10 minutes to export the first dataset that includes backfill data. The time to initially backfill data depends on the number of tables, but should not take more than a day. Ongoing data availability depends on the source, but Crisp data typically updates within six hours of source data availability. When the connector is deleted, Crisp deletes the connected datasets as well.
**To access your data in Looker Studio** :
1. Log in to Google BigQuery, then follow the instructions in the [BigQuery documentation > Star a project](https://cloud.google.com/bigquery/docs/bigquery-web-ui#starring_adding_a_project) article.
2. Choose to star your project by name and enter **crisp-platform-shared** as the project name.
3. In Looker Studio, create a new data source, then select Shared Projects and set the Billing Project to a project owned by your organization and the Shared project name to the name of your starred Crisp project (e.g., **crisp-platform-shared** ). For more: [Looker Studio Help > Connect to Google BigQuery](https://support.google.com/looker-studio/answer/6370296).
#### Using Crisp Looker Studio Templates
For your convenience, we have created Looker Studio templates to help you get started analyzing your data. To get started using templates:
1\. Set up the Google Looker Studio connector as described in the section above.
2\. Confirm you've previously connected BigQuery to Crisp by opening [BigQuery](https://console.cloud.google.com/bigquery) and locating "crisp-platform-shared" in the list of projects in the sidebar. If you haven't connected yet, please follow [these steps](/docs/support/articles-BigQuery-connection-setup-guide).
3\. Open the template, then select the **Use template** button at the top-right corner of the screen.
 4\. A *Copy this report* window will open, prompting you to choose a data source. Search for and select your source.
 5\. Click the **Copy report** button.
 6\. The report is now ready for you to re-name and work from.
### Templates
#### Crisp ONE
1\. Click [here](https://datastudio.google.com/reporting/29000394-709c-40a8-aa74-411ce3f49661/page/qLEaC) to open the Crisp ONE template in a new window.
2\. Select the **⋮** vertical ellipses in the top-right corner of the screen, then select **Make a copy.**
6\. The report is now ready for you to re-name and work from.
### Templates
#### Crisp ONE
1\. Click [here](https://datastudio.google.com/reporting/29000394-709c-40a8-aa74-411ce3f49661/page/qLEaC) to open the Crisp ONE template in a new window.
2\. Select the **⋮** vertical ellipses in the top-right corner of the screen, then select **Make a copy.**
 3\. The *Copy this report* window appears, prompting you to choose a data source. Search for and select your source.
4\. Select the **Copy Report** button.
5\. The report is now ready for you to re-name and work from.
*Looking for additional Looker Studio resources? Please visit [https://support.google.com/looker-studio](https://support.google.com/looker-studio) or email [support@gocrisp.com](mailto:support@gocrisp.com)*
3\. The *Copy this report* window appears, prompting you to choose a data source. Search for and select your source.
4\. Select the **Copy Report** button.
5\. The report is now ready for you to re-name and work from.
*Looking for additional Looker Studio resources? Please visit [https://support.google.com/looker-studio](https://support.google.com/looker-studio) or email [support@gocrisp.com](mailto:support@gocrisp.com)*