> ## Documentation Index
> Fetch the complete documentation index at: https://docs.gocrisp.com/llms.txt
> Use this file to discover all available pages before exploring further.
# Connecting on-premise SQL Server to Crisp Data Platform
Crisp's destination connectors allow users to quickly and easily import data into their on-premise databases. Below is a guide for doing this with our Azure Blob Storage connector.
In this example, you will need to have the following to start:
* A [Crisp](https://platform.gocrisp.com) account with the appropriate subscription level
* An [Azure Blob Storage](https://azure.microsoft.com/en-us/services/storage/blobs/) account
* [SQL Server data Tools (SSDT) for Visual Studio ](https://docs.microsoft.com/en-us/sql/ssdt/download-sql-server-data-tools-ssdt?view=sql-server-ver15)to set up the data flow task
* [SQL Server Management Studio](https://docs.microsoft.com/en-us/sql/relational-databases/databases/create-a-database?view=sql-server-ver15) for creating and managing your on-premises database
### Example Setup
1\. Make sure your connector is set up in Crisp. You can refer to our [Azure Blob Storage connection setup guide](/docs/support/articles-Azure-Blob-Storage-connection-setup-guide) if you encounter any issues.
2\. Open [SQL Server Data Tools (SSDT) for Visual Studio.](https://docs.microsoft.com/en-us/sql/ssdt/download-sql-server-data-tools-ssdt?view=sql-server-ver15)
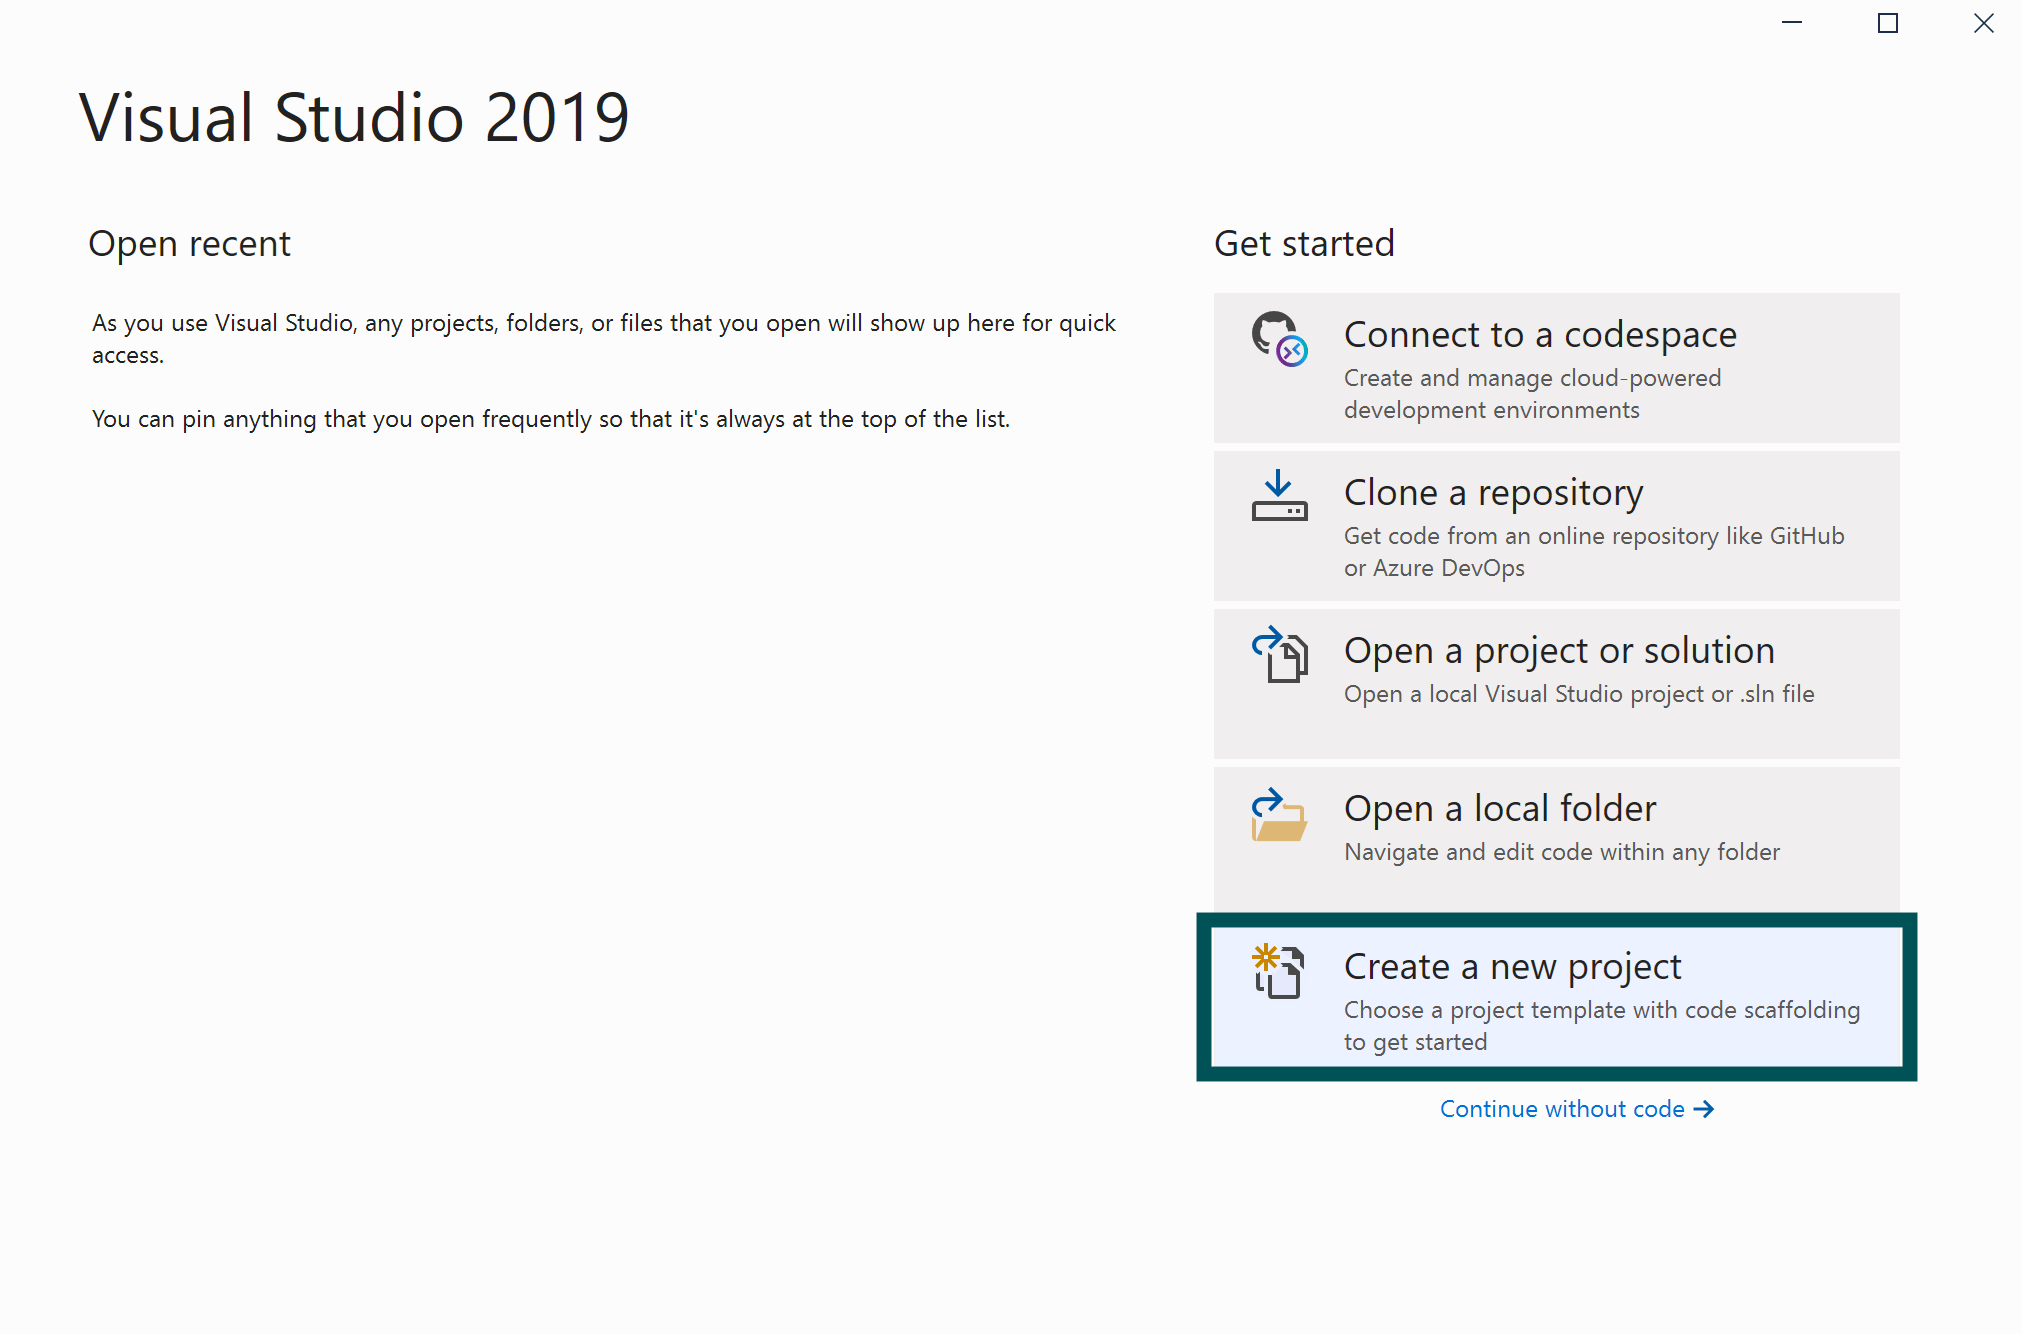
3\. Click "Create a new project."
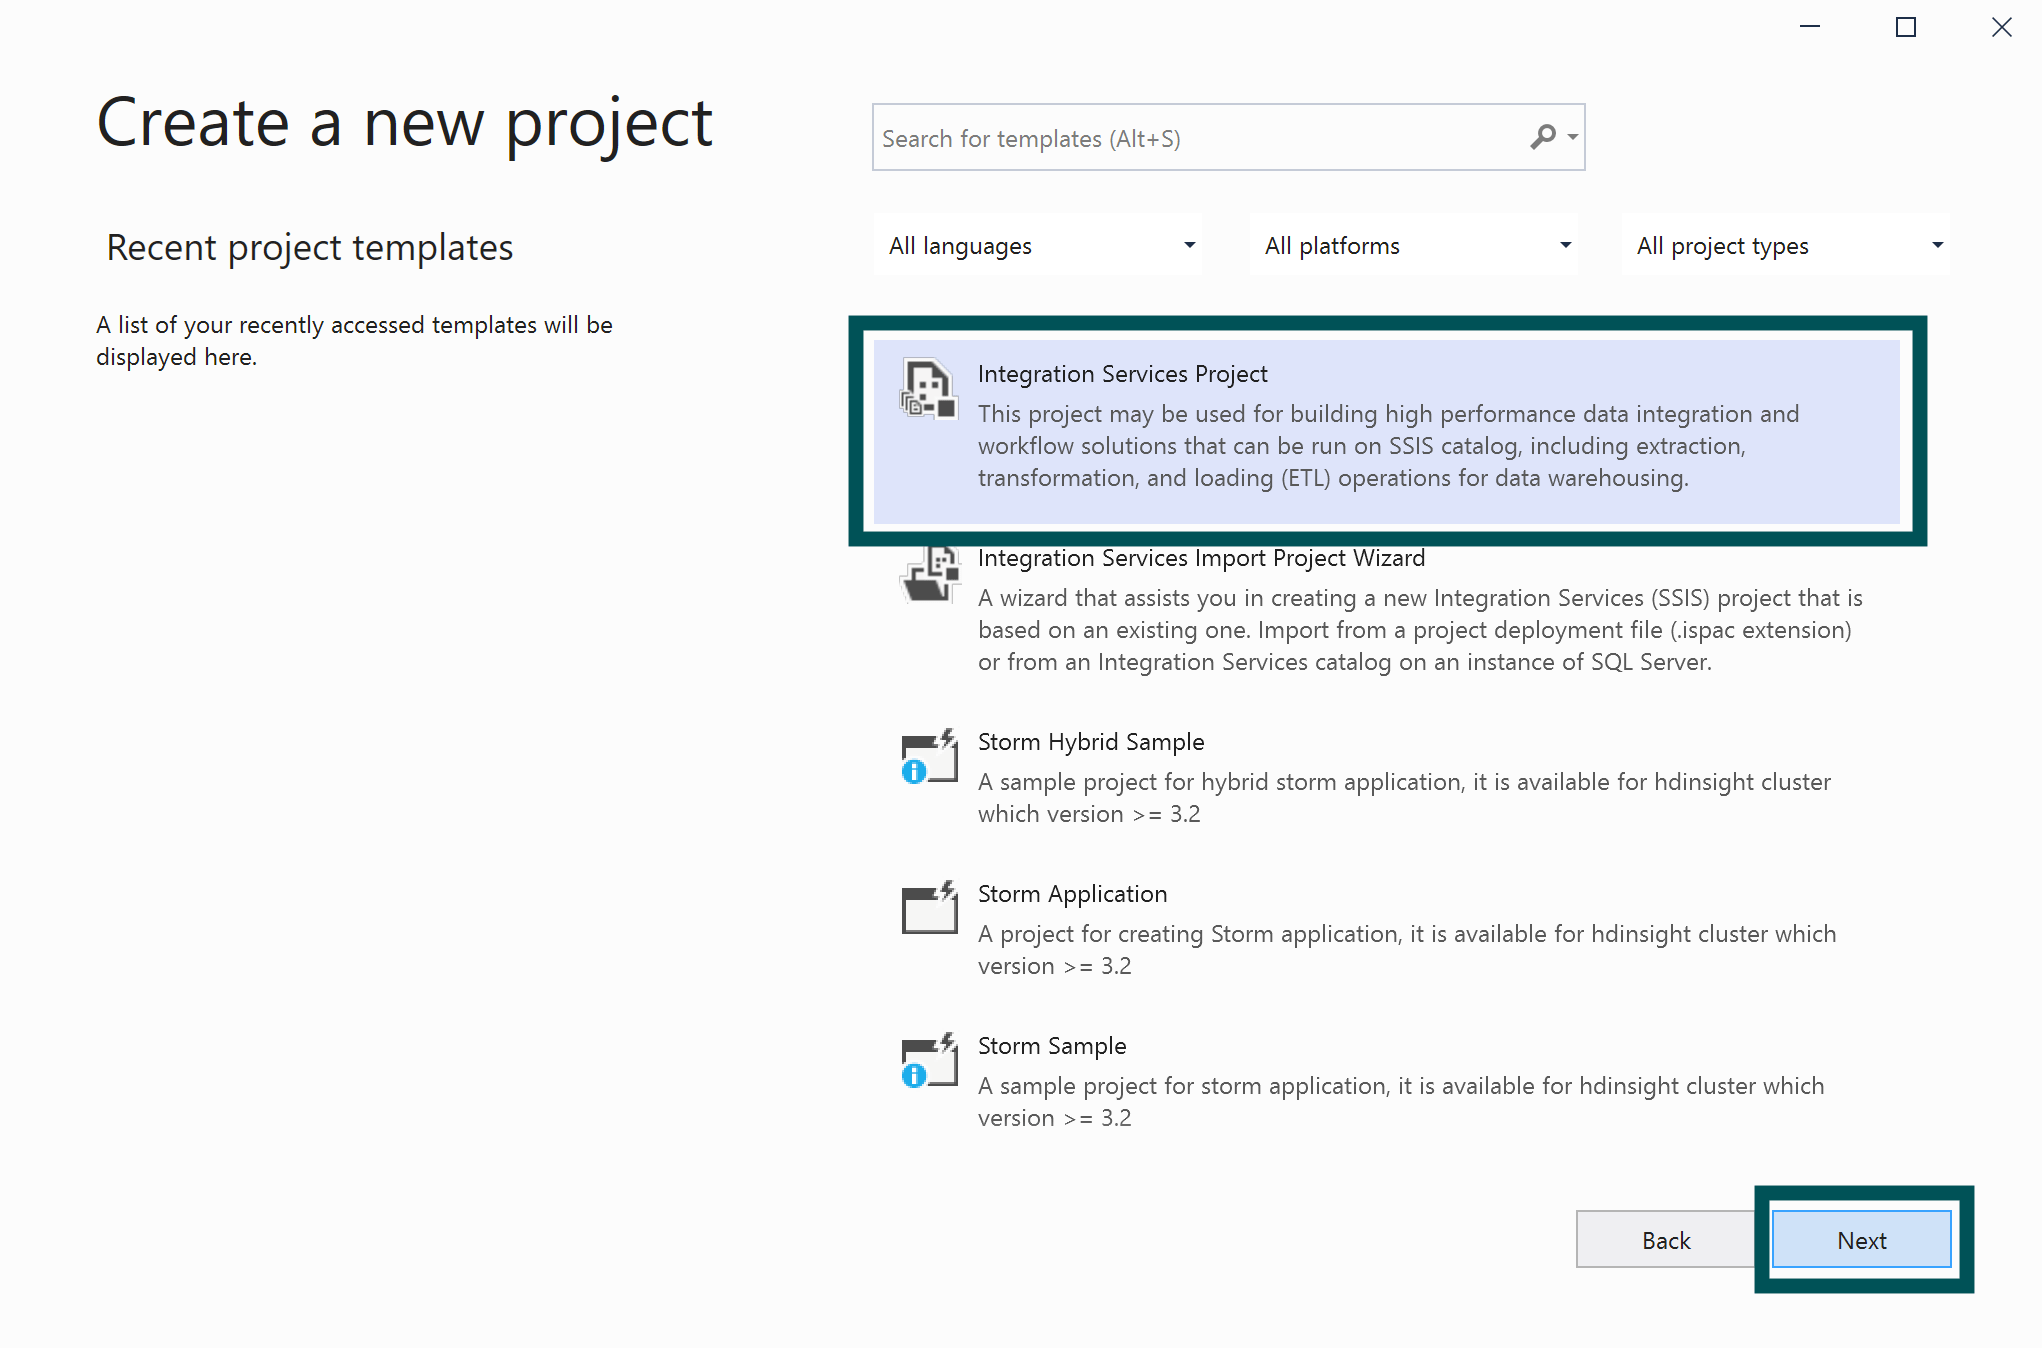
 4\. Scroll down the list of templates and select “Integration Services Project" and then "Next."
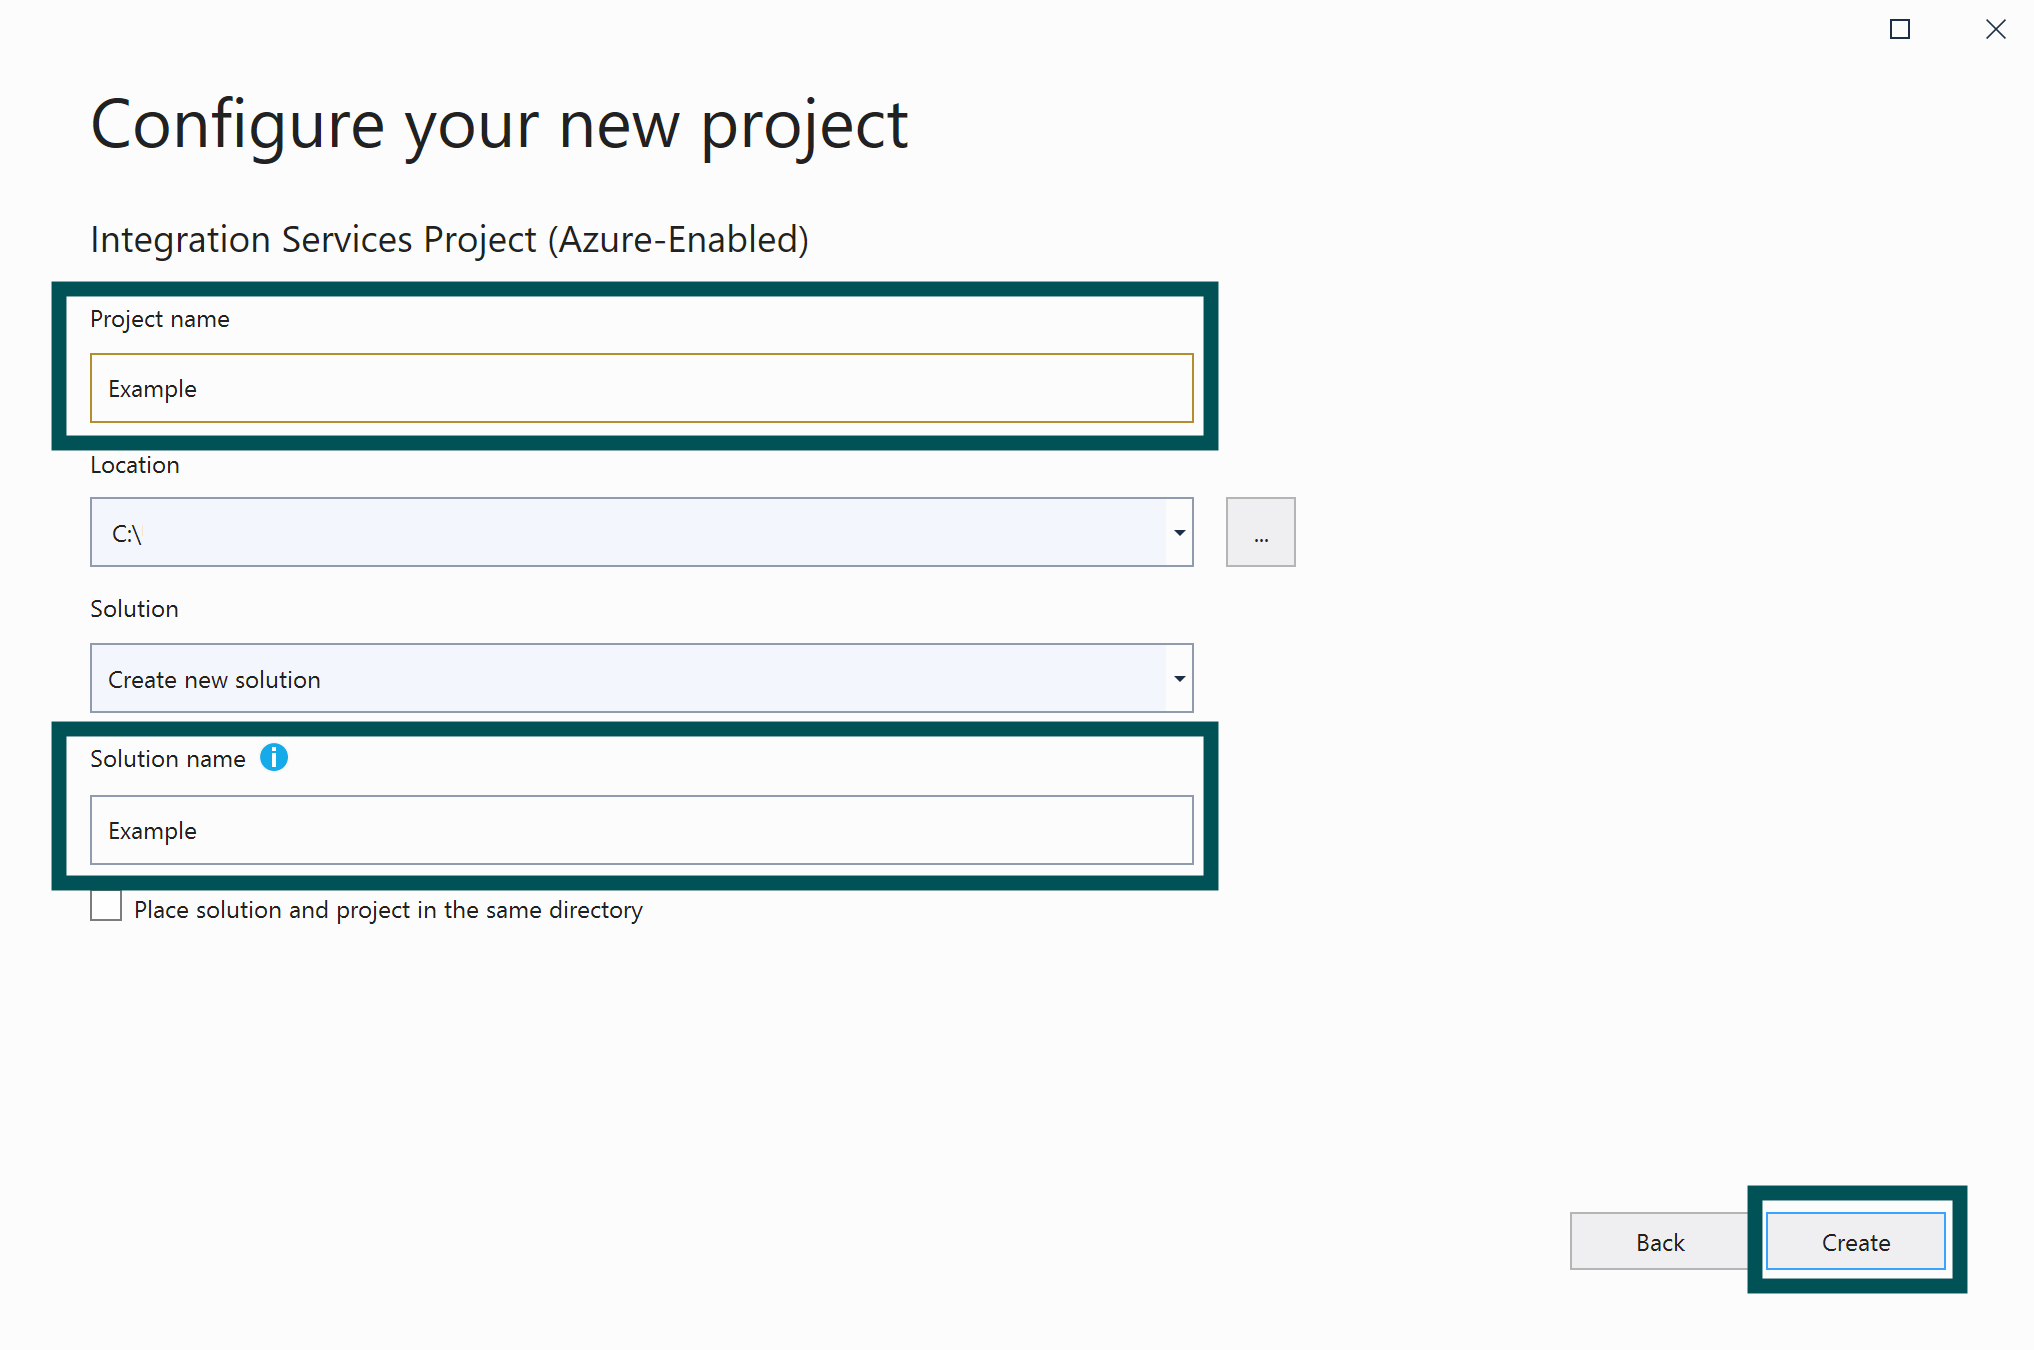
 5\. Fill out the fields in the "Configure your project" screen and then click "Create."
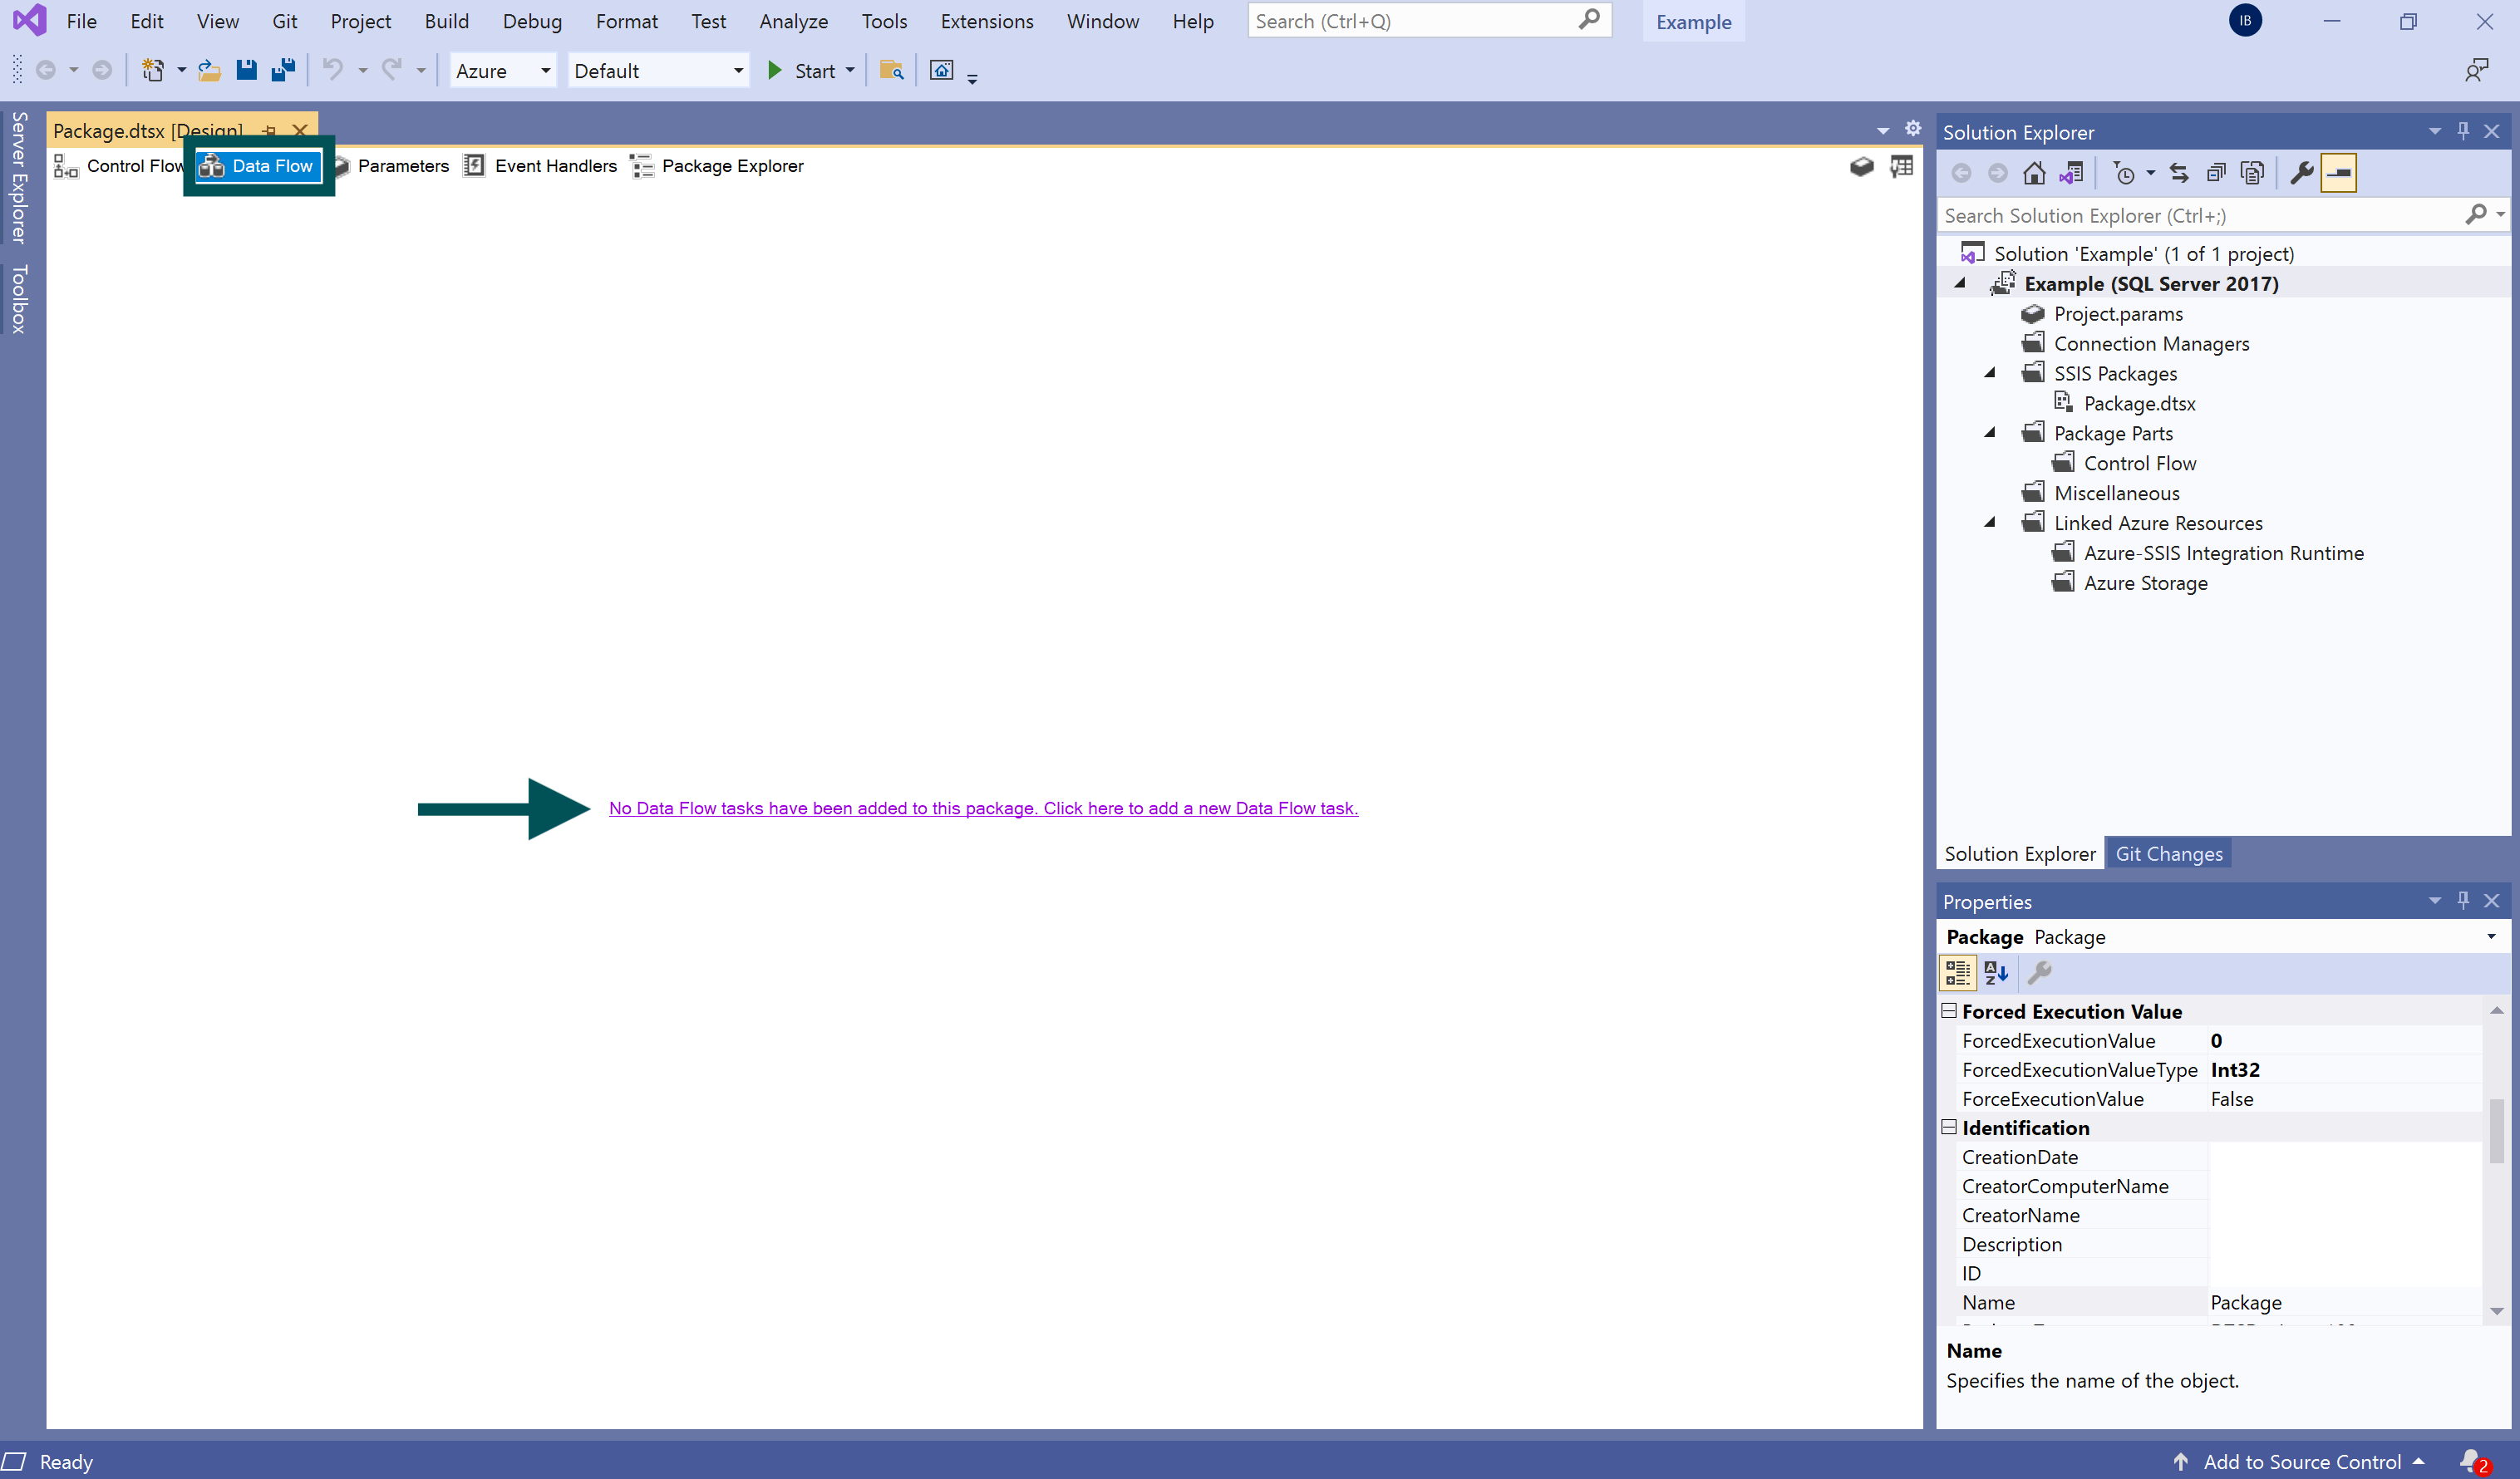
 6\. Select the “Data Flow” tab at the top of the screen and click the link in the center to "add a new Data Flow task."
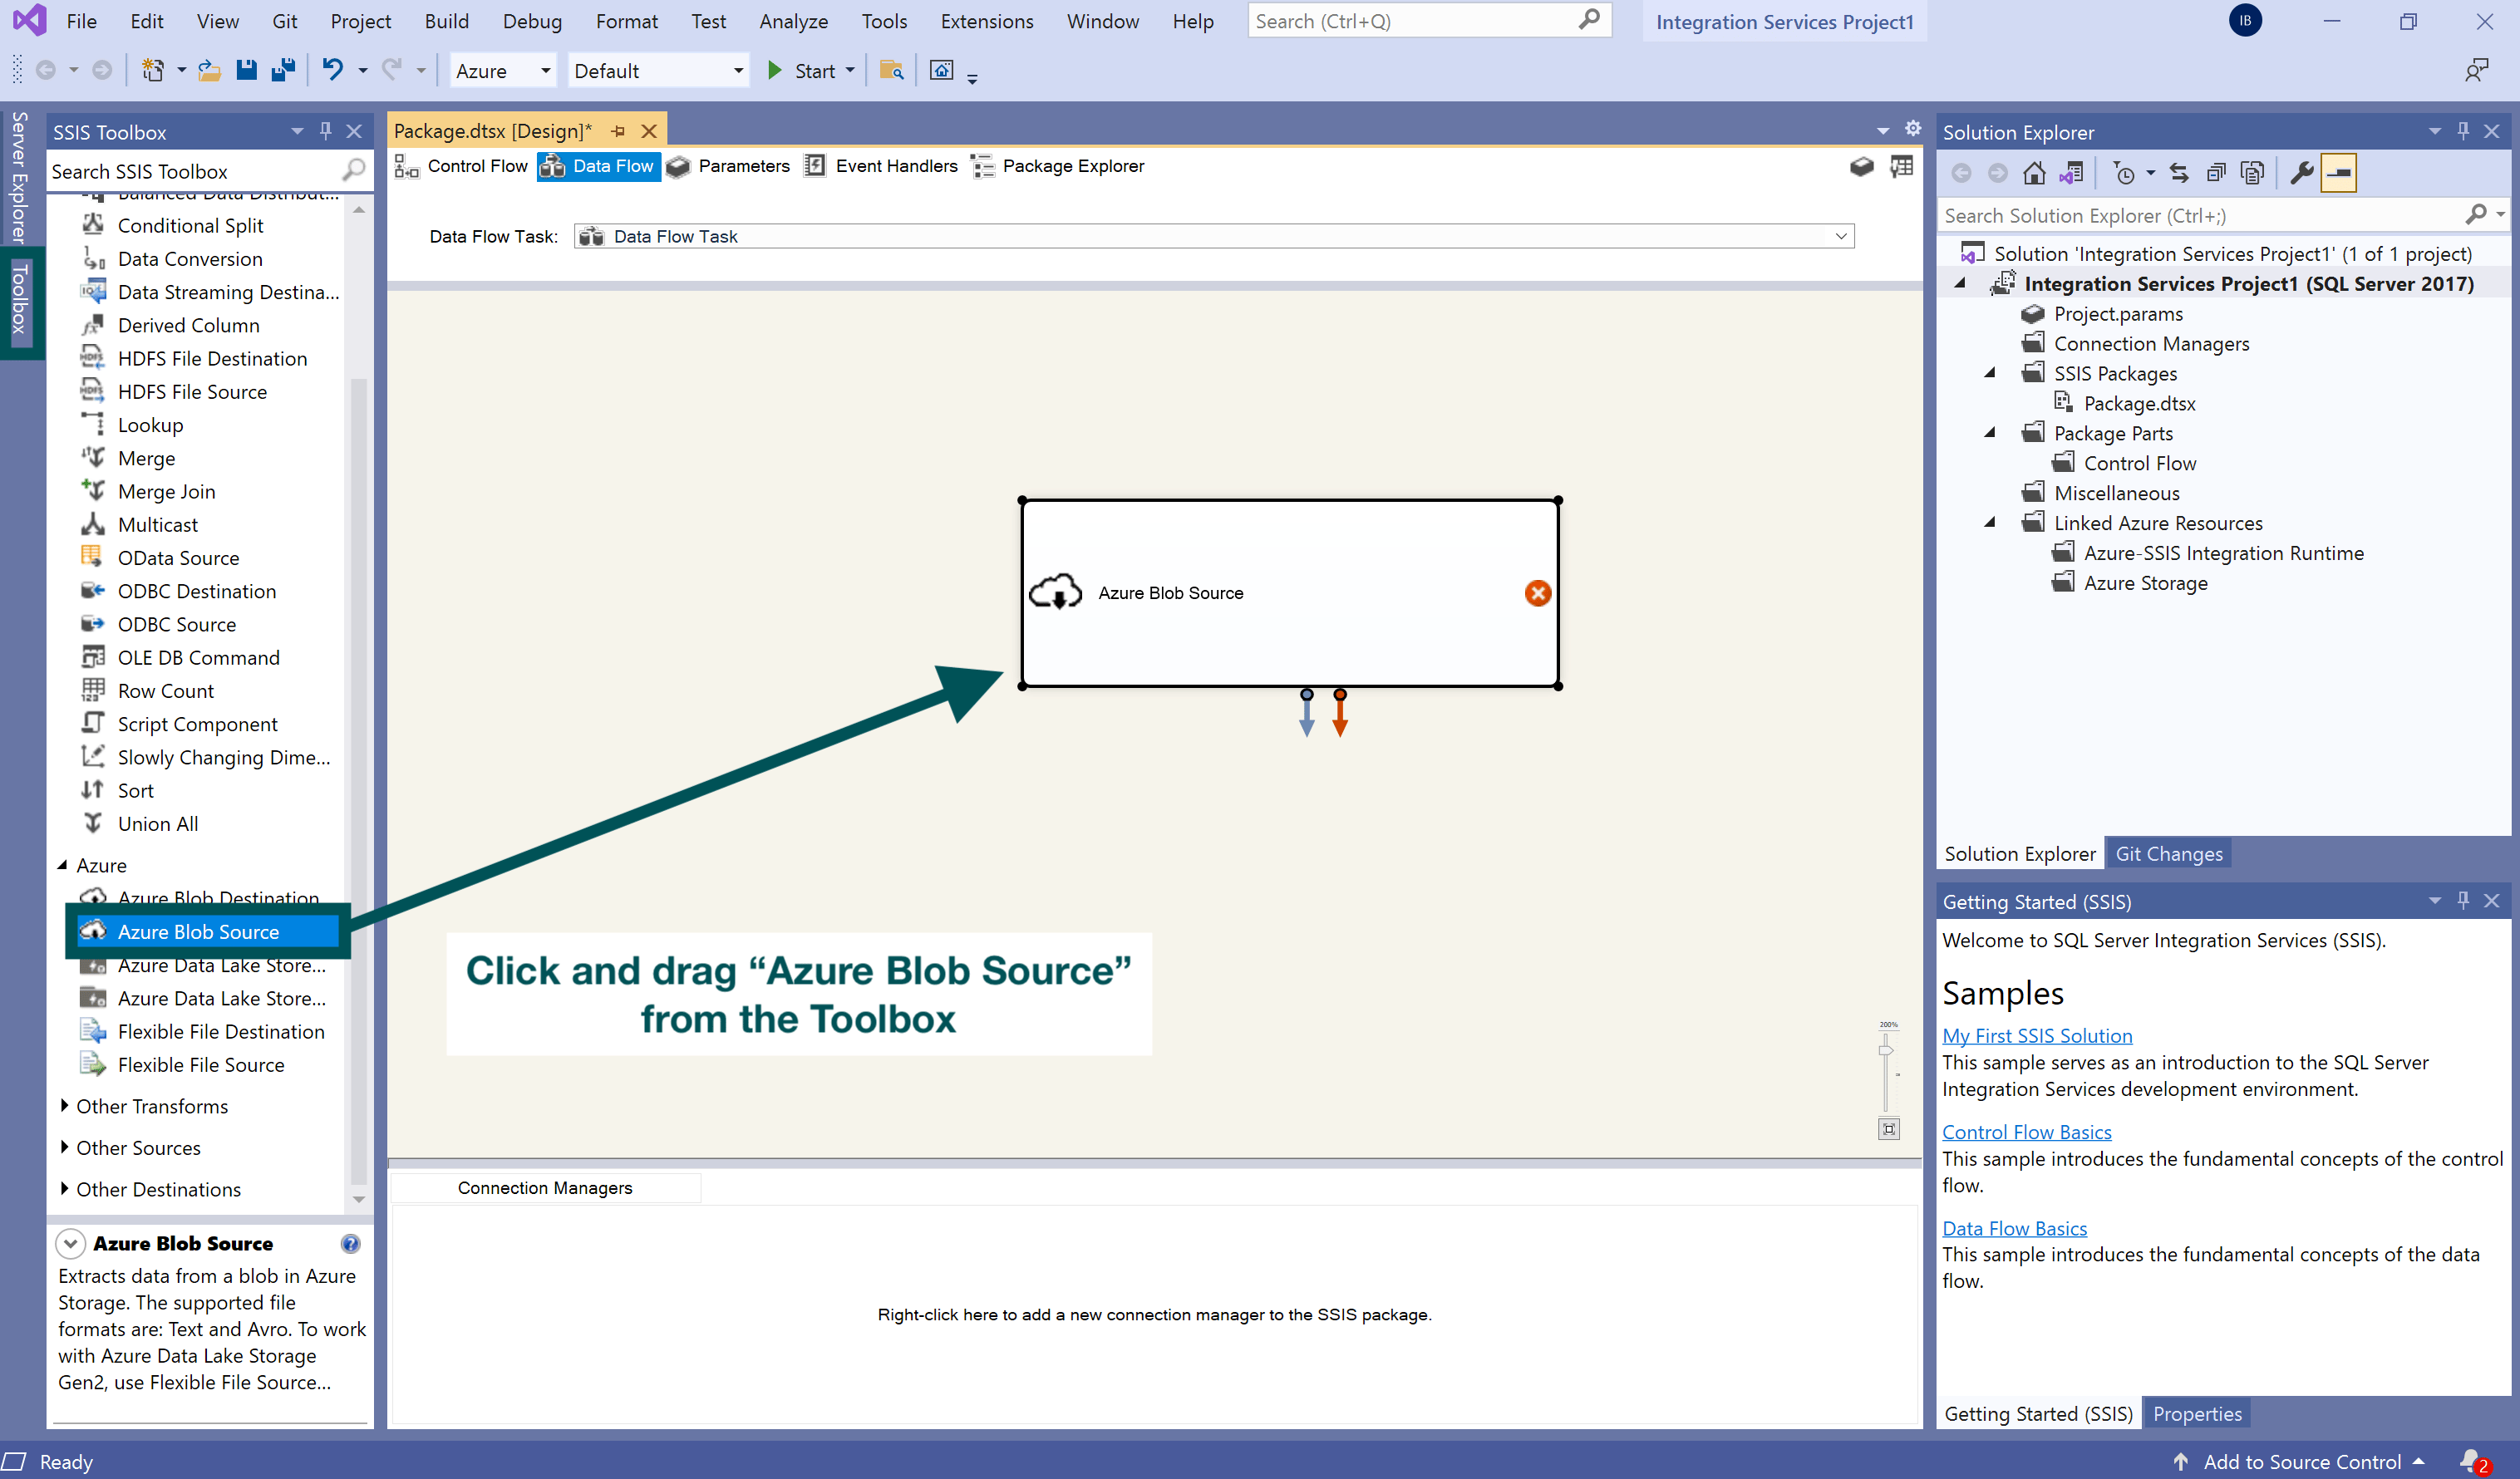
 7\. Open the "Toolbox" tab on the left of the screen and make sure you have the [Azure Feature Pack](https://docs.microsoft.com/en-us/sql/integration-services/azure-feature-pack-for-integration-services-ssis?view=sql-server-ver15) installed. Under "Azure," click "Azure Blob Source" and drag from the "Toolbox" to the center.
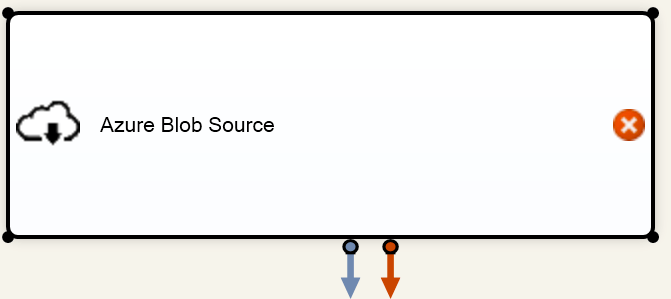
 8\. Double click on the "Azure Blob Source" box.
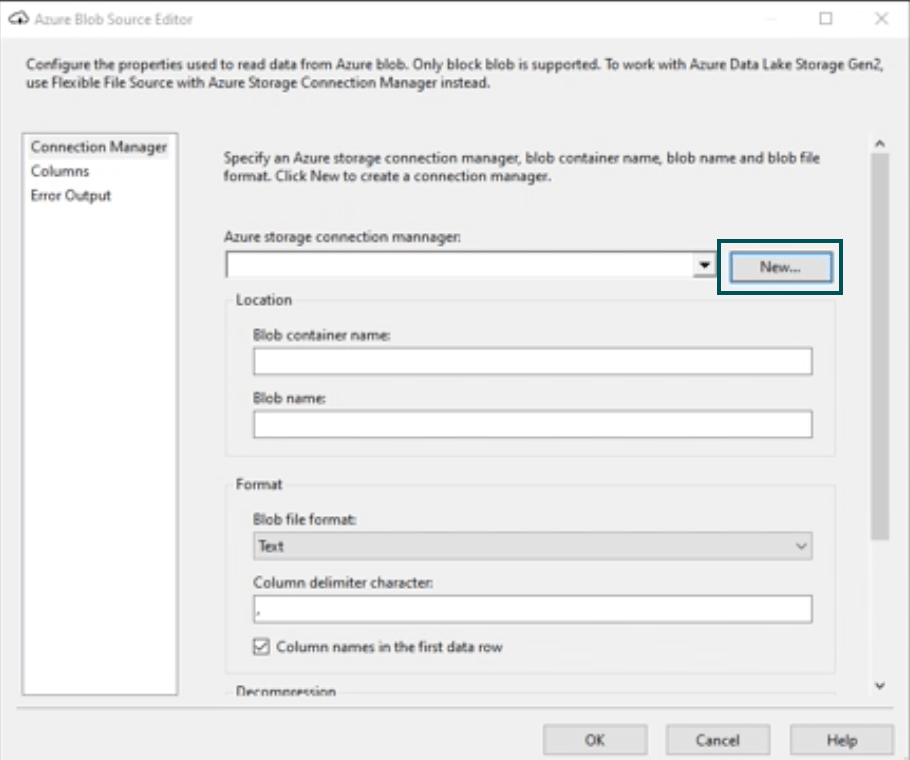
 9\. An "Azure Blob Source Editor" window will open for you to configure. Click the "New\..." button.
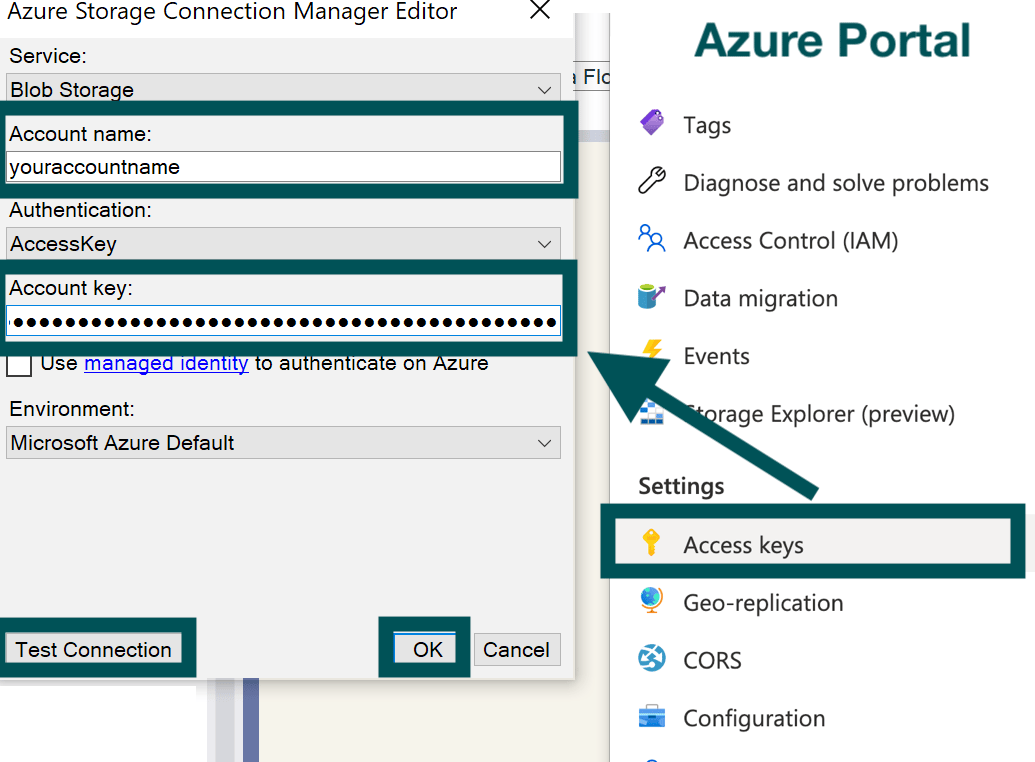
 10\. In the editor window, enter your Azure account name and paste in your [Access Key](https://docs.microsoft.com/en-us/azure/storage/common/storage-account-keys-manage?tabs=azure-portal) from Azure. Then click "Test Connection" and "OK."
 11\. Under "Location" provide your "Blob container name" and type or paste in your "Blob name" (it's likely a CSV file). After those have been provided, click "OK."
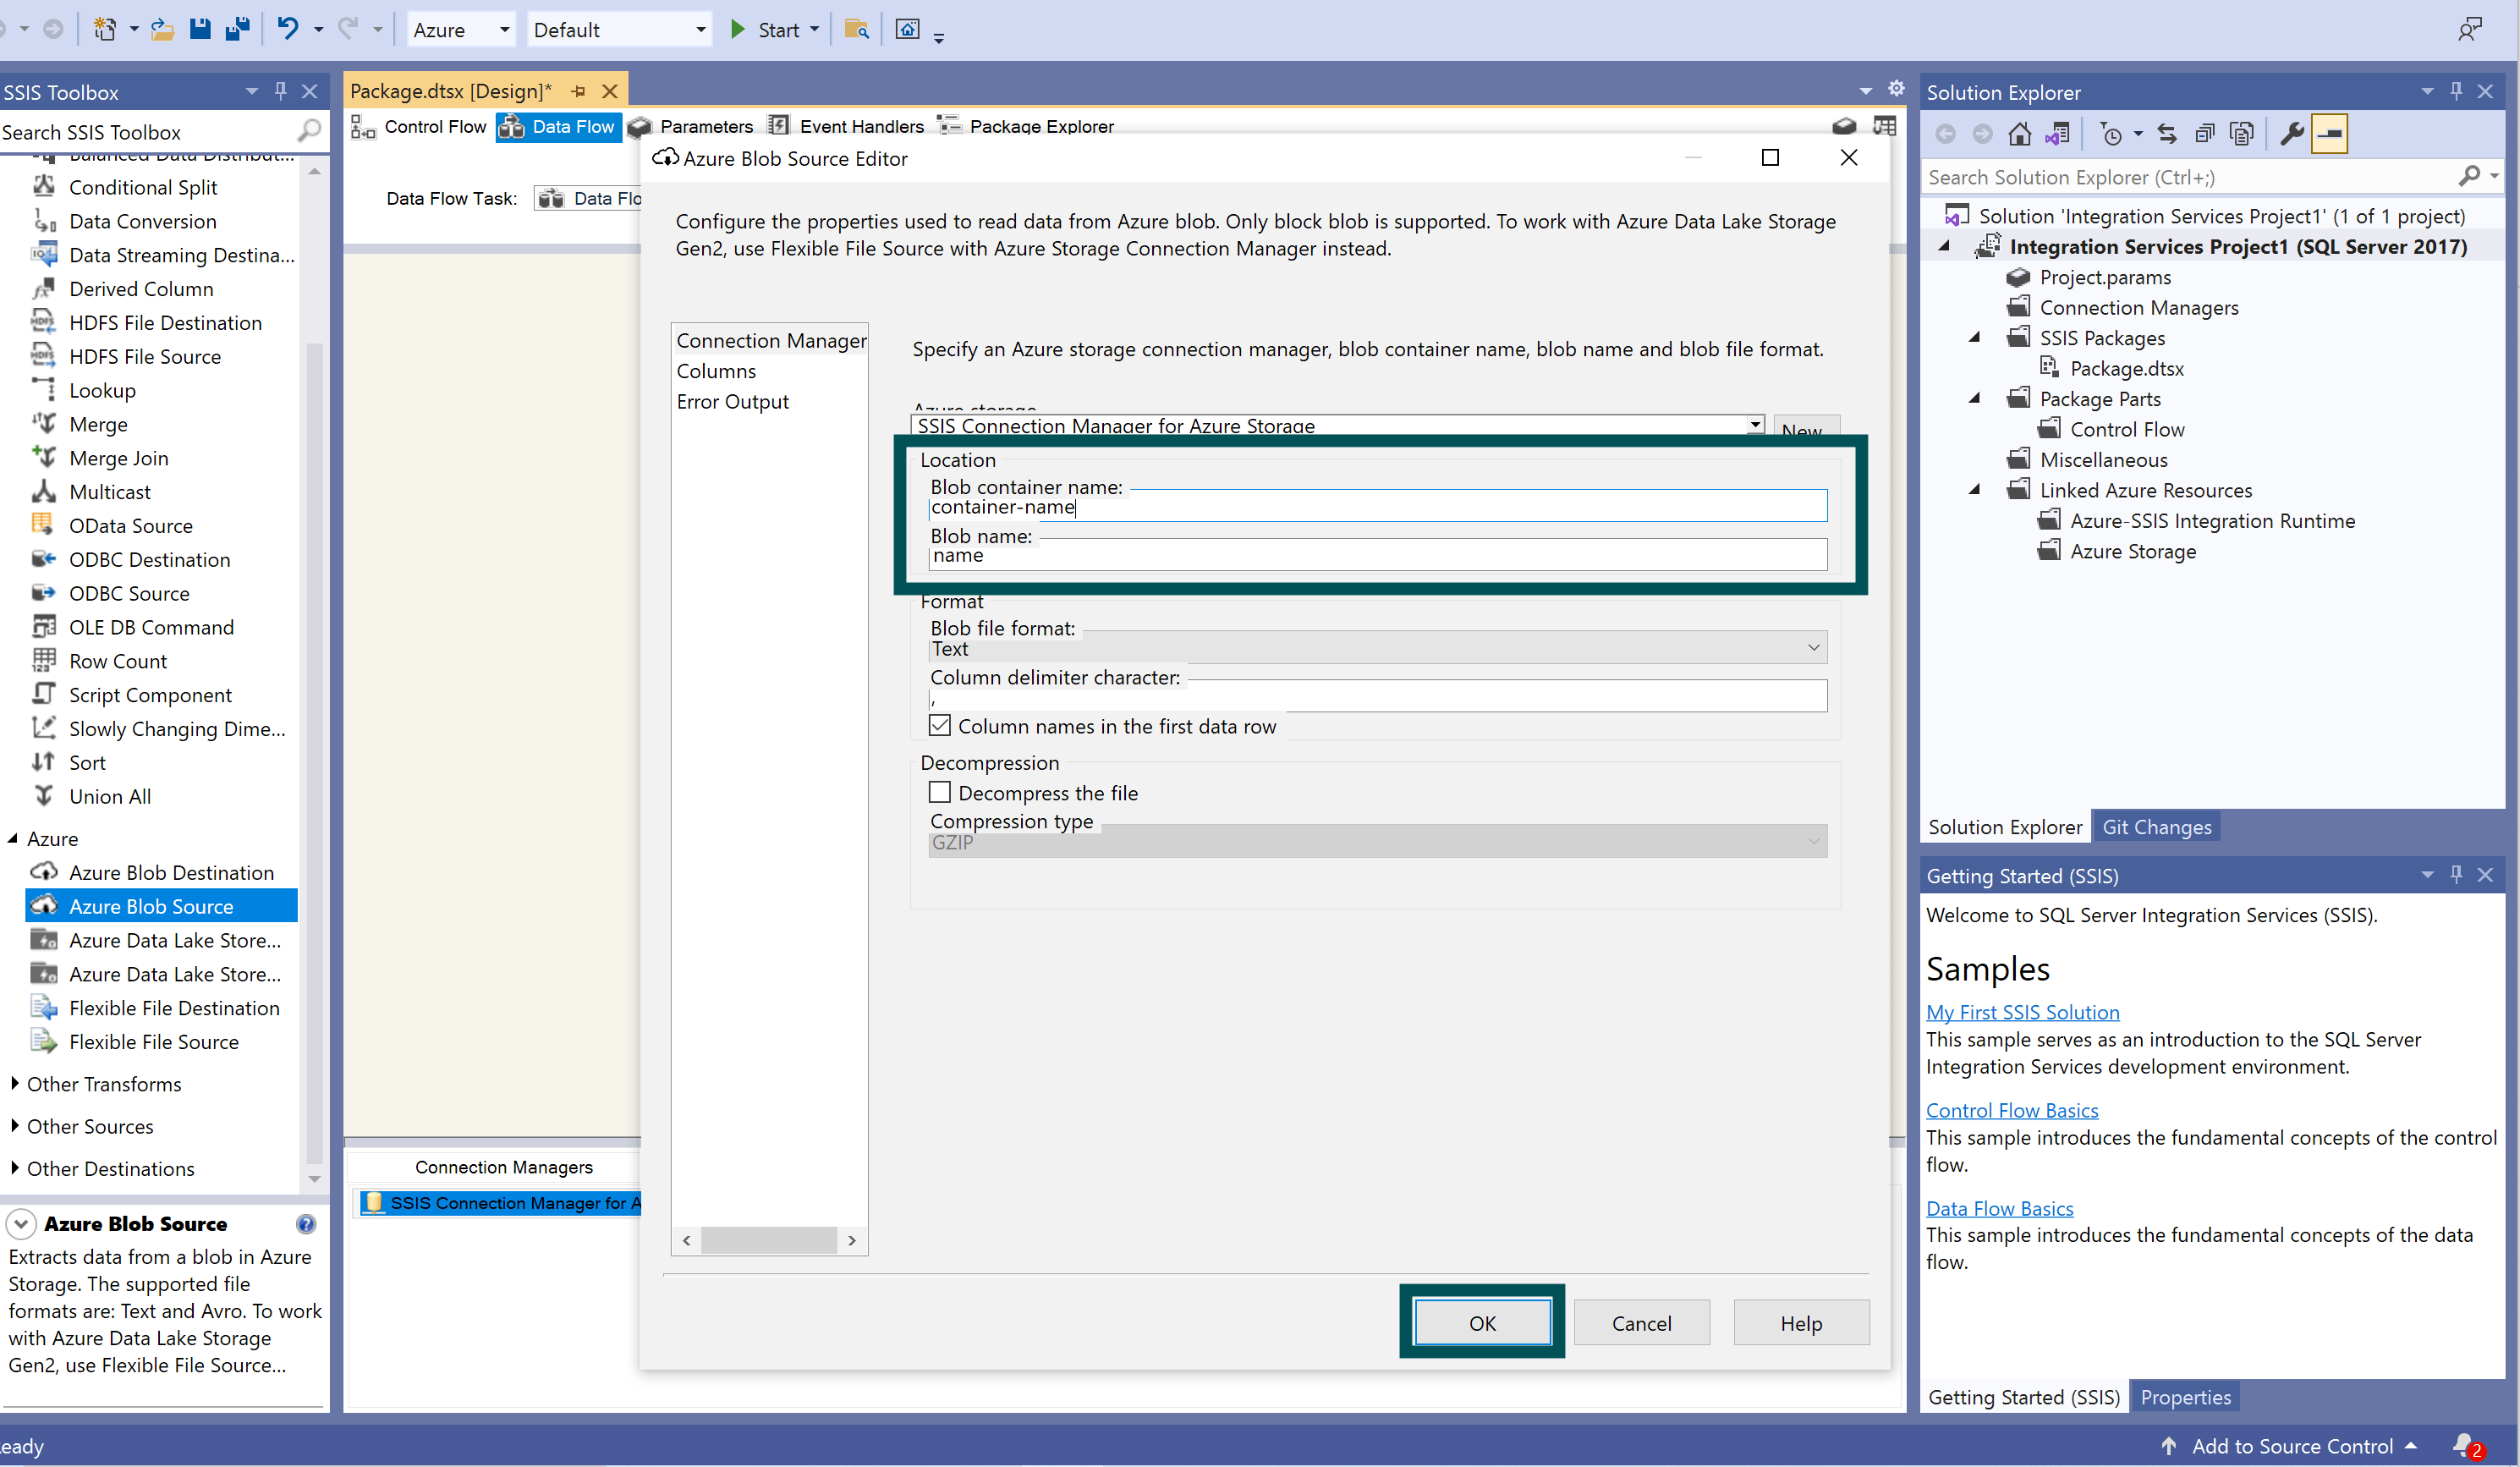 12. Scroll down the "Toolbox" on the left. Under "Other Destinations," click "SQL Server Destination" and drag it to the center of the screen.
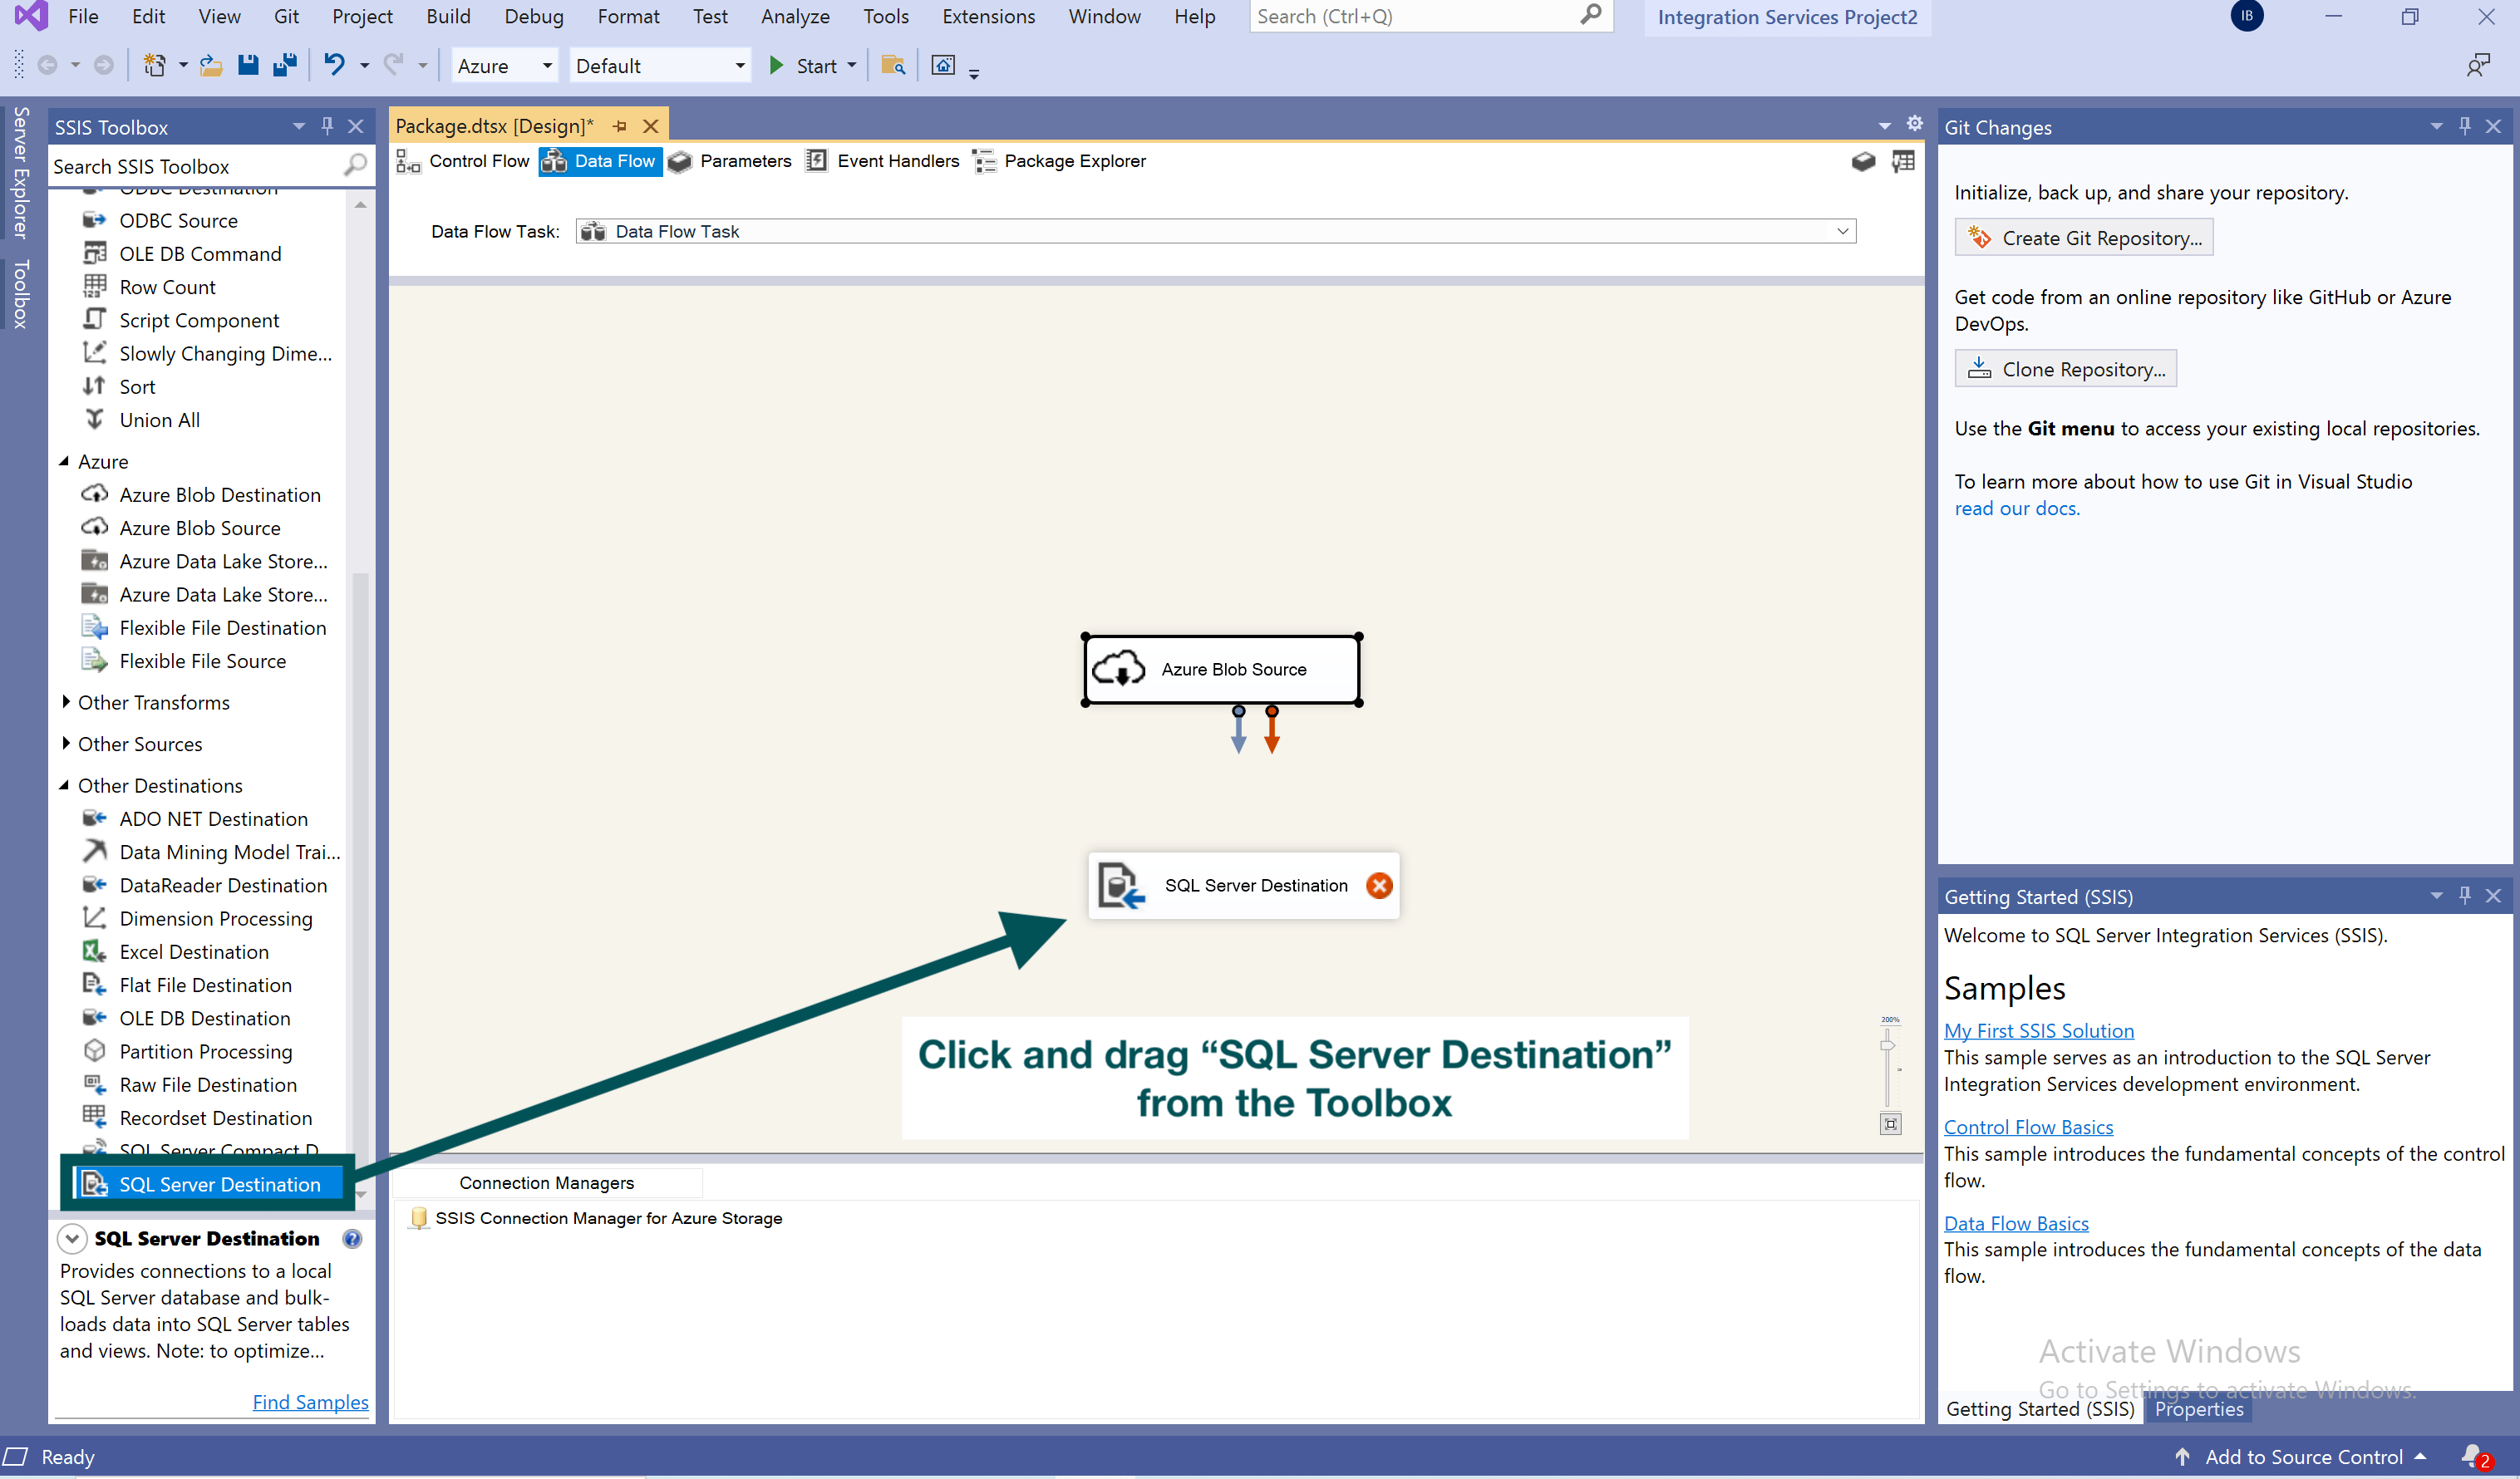 13\. Click and drag the blue arrow from "Azure Blob Source" to "SQL Server Destination."
14. Double click on the "SQL Server Destination" box.
13\. Click and drag the blue arrow from "Azure Blob Source" to "SQL Server Destination."
14. Double click on the "SQL Server Destination" box.
 15\. The "SQL Destination Editor" window will open. Next to "Connection manager," click the "New\..." button.
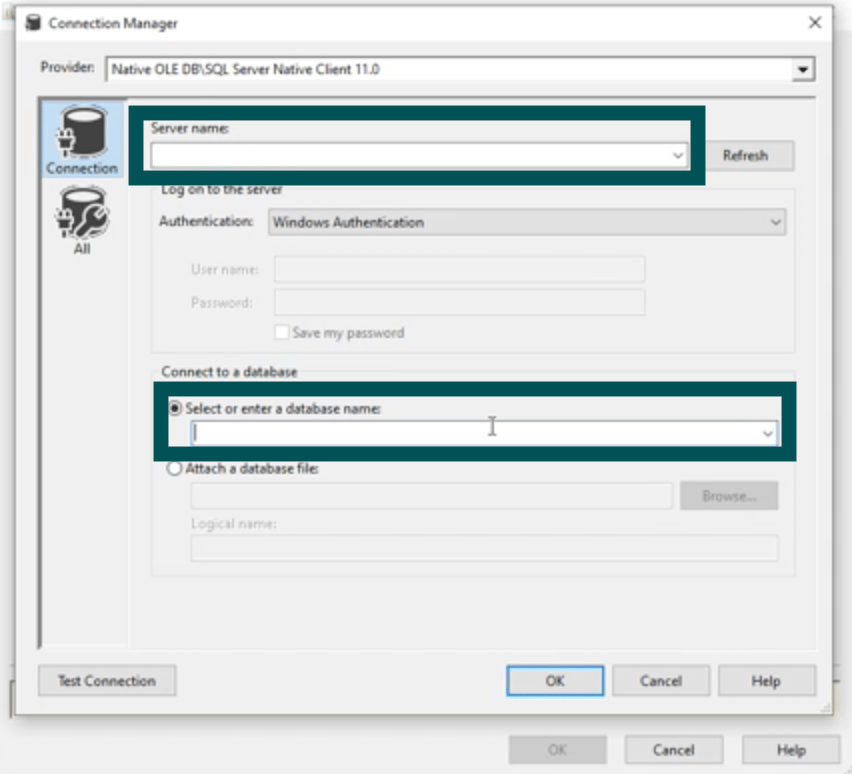
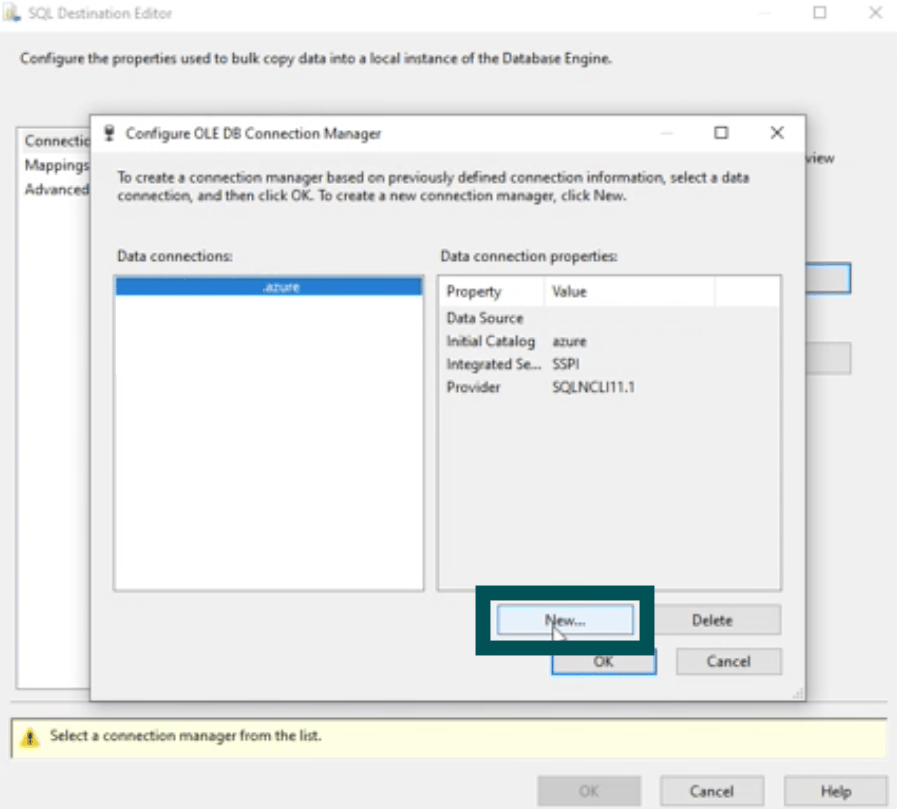 16\. Click the "Server name" and "database name" dropdowns and select the server and database for your database created in [SQL Server Management Studio.](https://docs.microsoft.com/en-us/sql/relational-databases/databases/create-a-database?view=sql-server-ver15) Then click "OK."
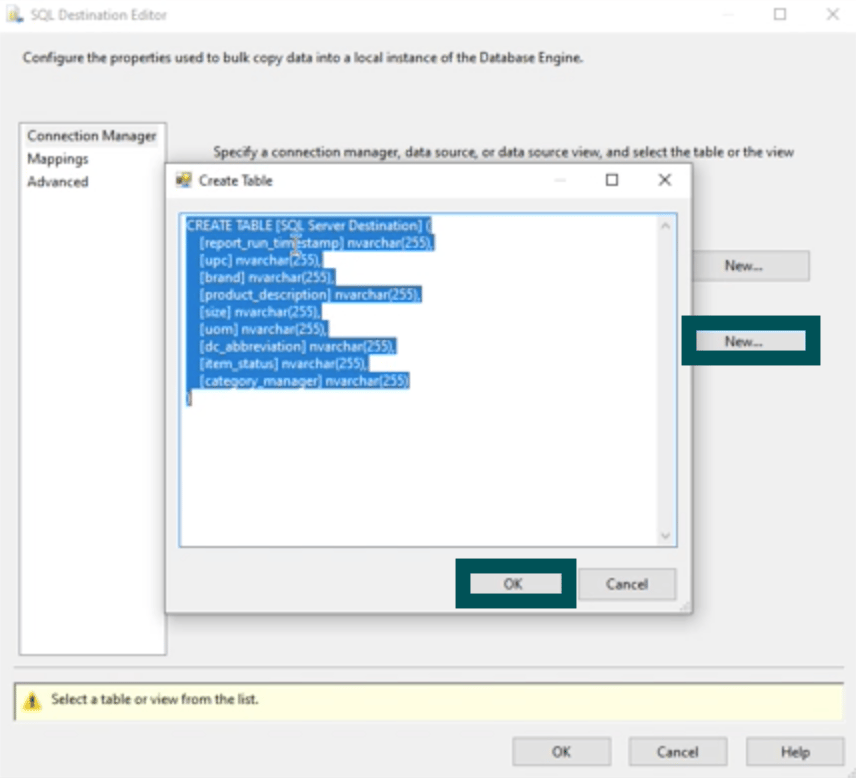
 17\. You'll be returned to the original "SQL Destination Editor" window. From there, click the "New\..." button next to "Use a table or view." Here you can choose to name your table. The recommended best practice is to name it the same as the name of the report being downloaded. When finished, click "OK."
 18\. You can now navigate to the "Control Flow" tab at the top of the screen and click "Start" to run your "Data Flow Task." Within seconds, your data will begin to flow to your on-premises solution. Please note, you will still need to add your own logic, such as date parameterization, to fully implement a scheduled work flow to download reports on a frequent basis.
